
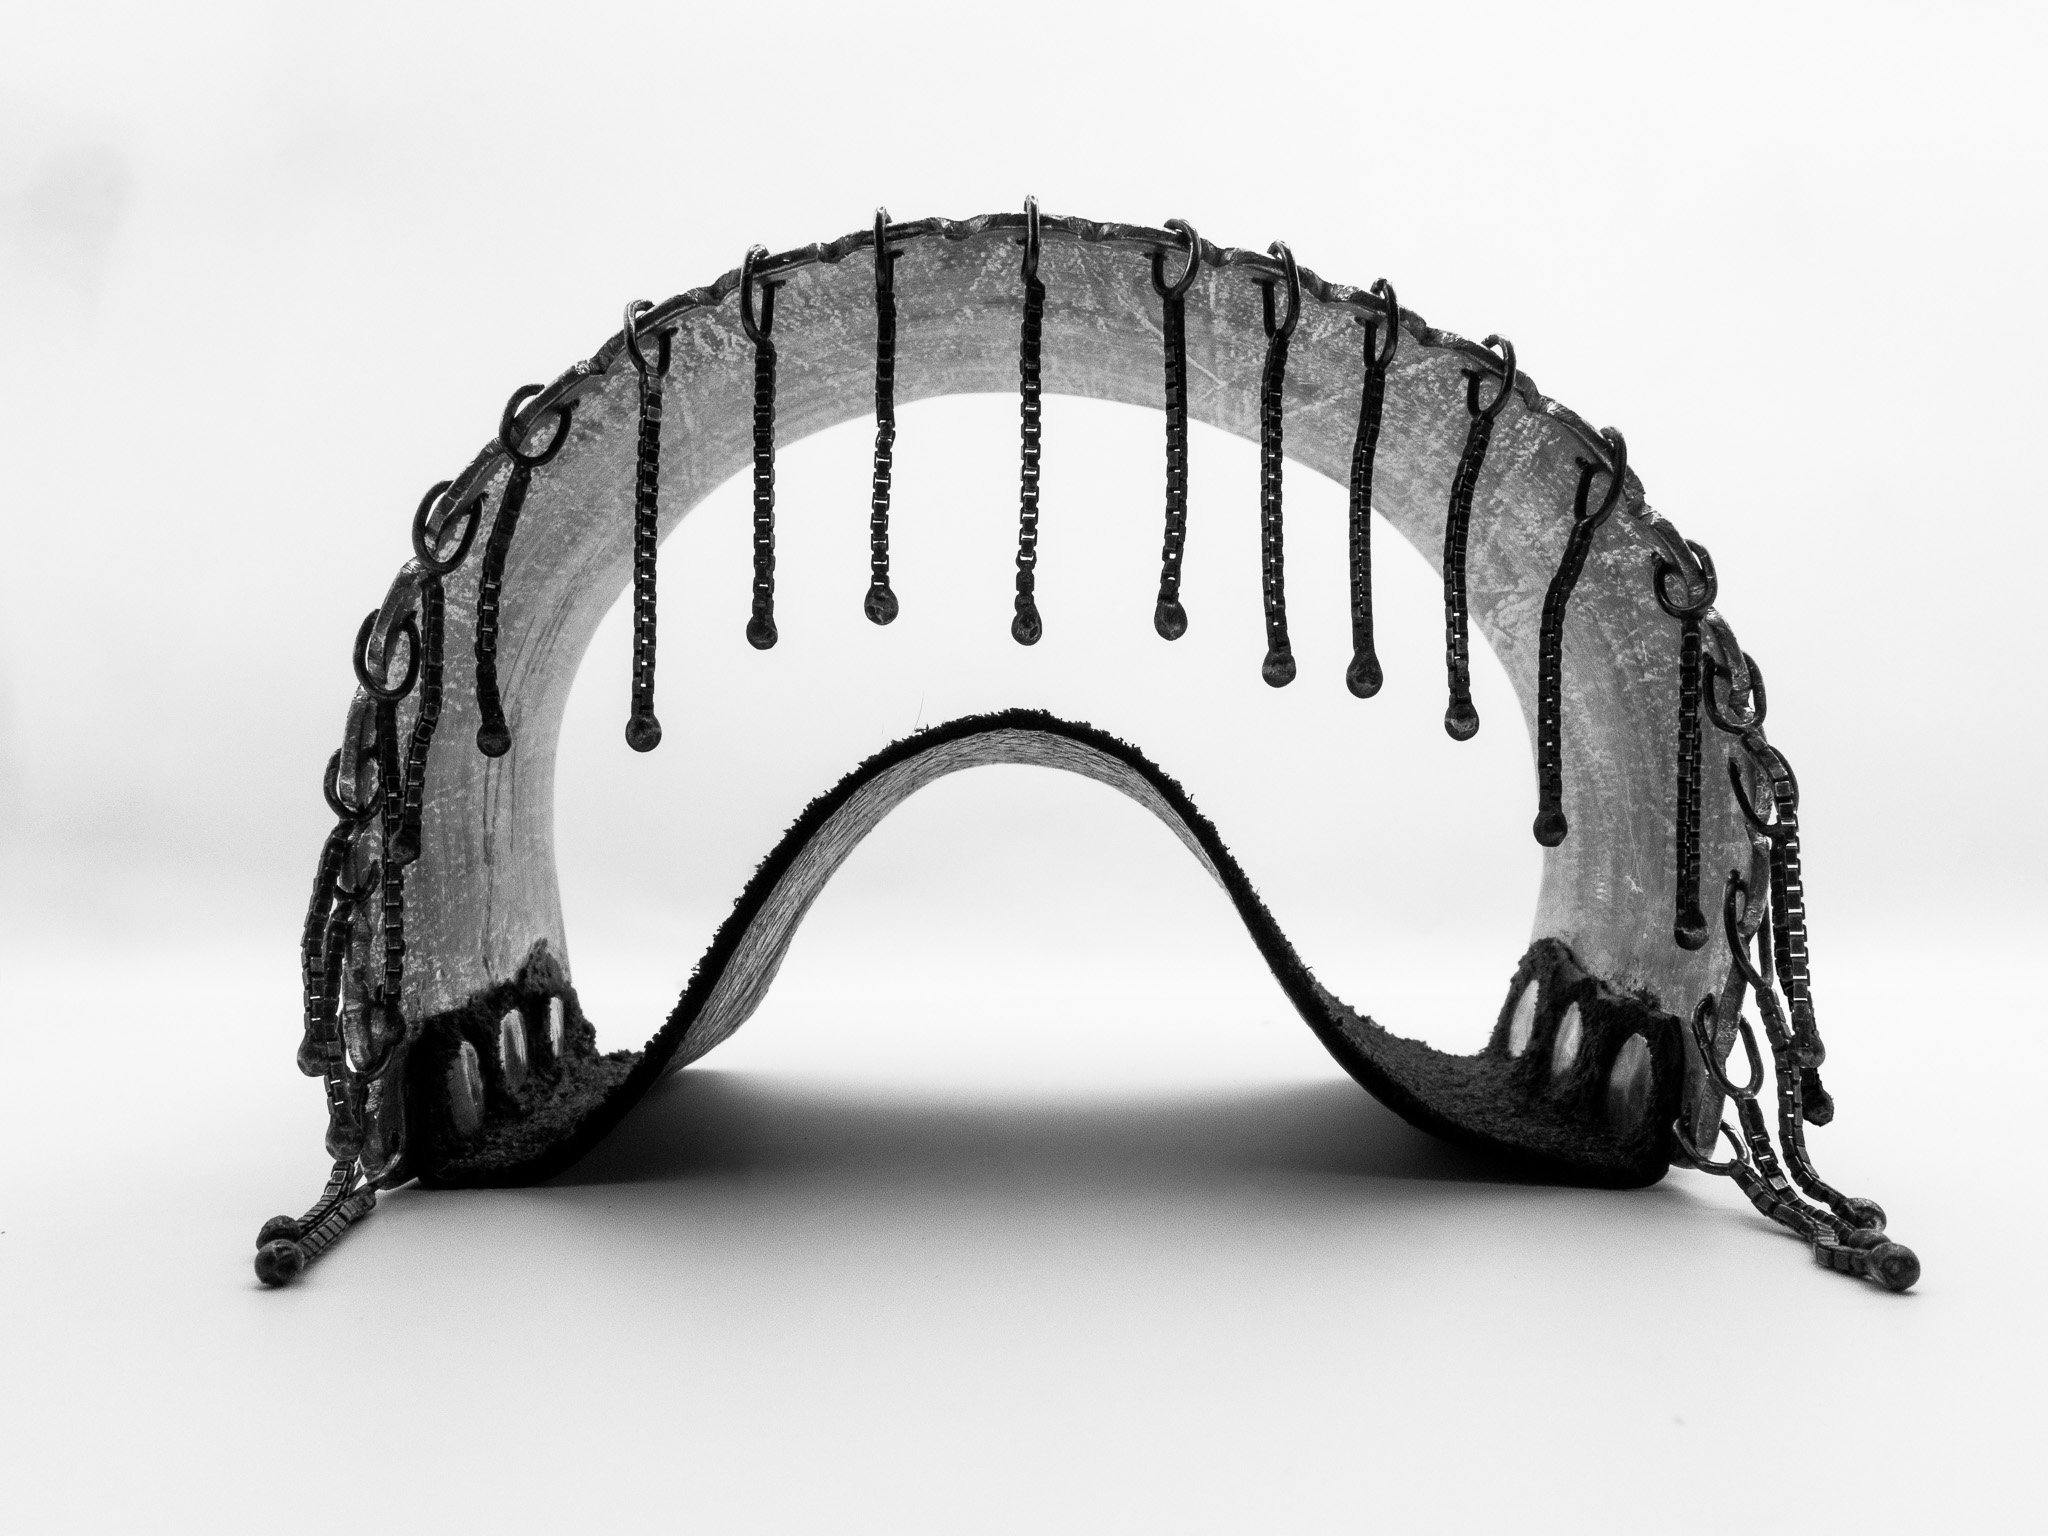
LACE CUFF
LACE CUFF
16/10/25
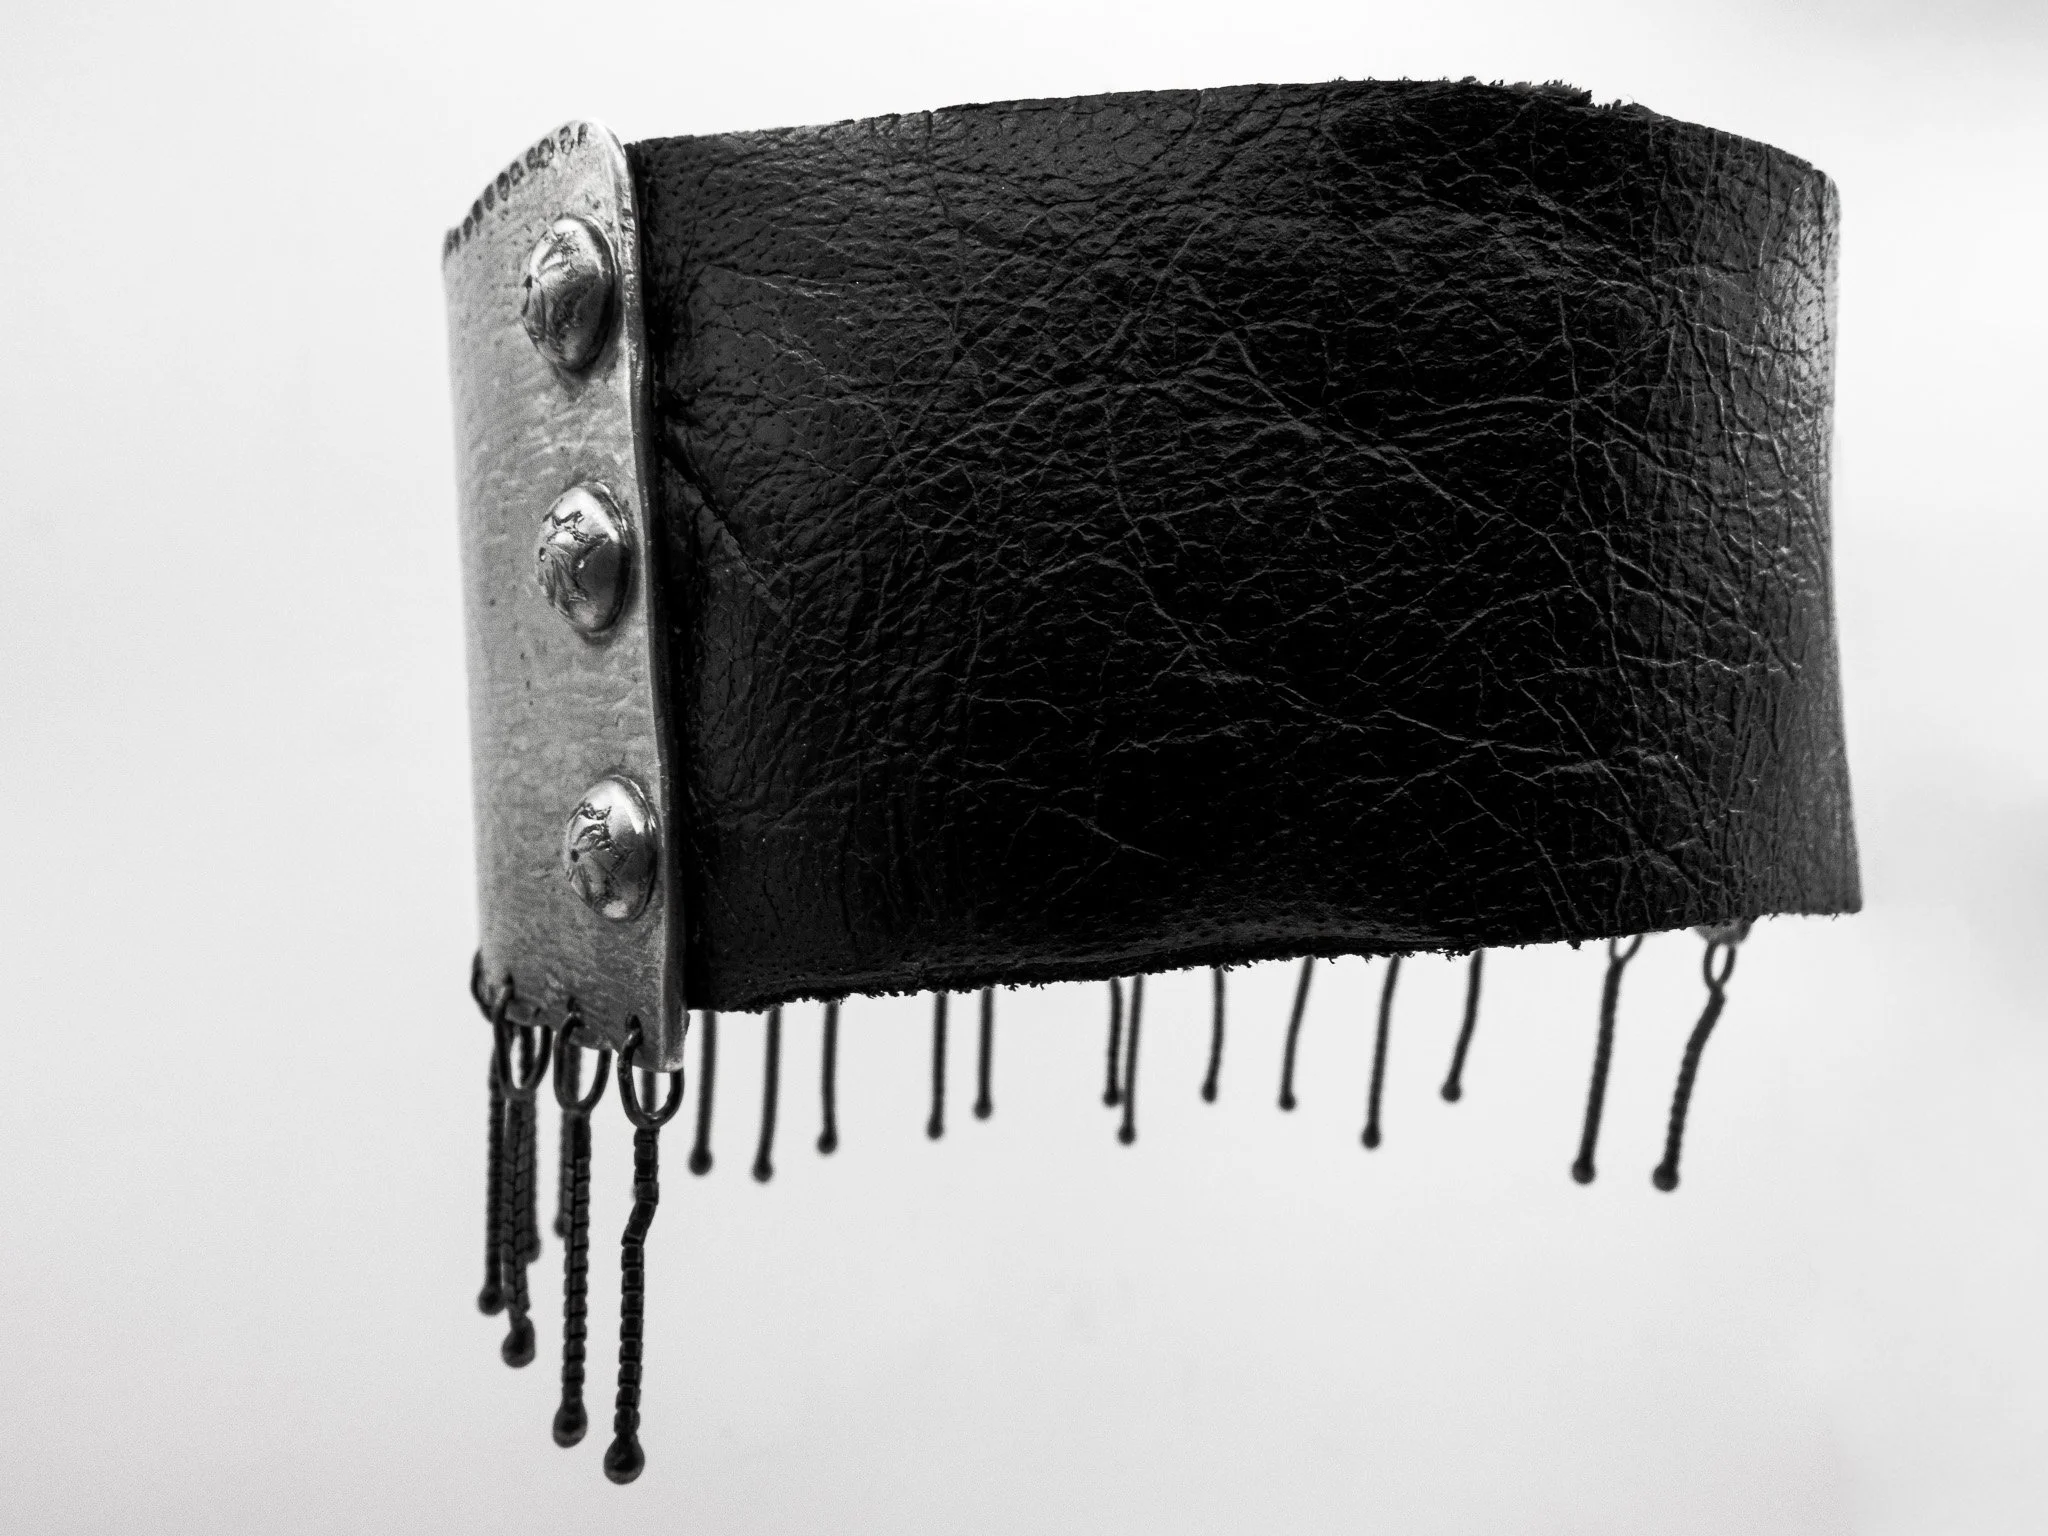
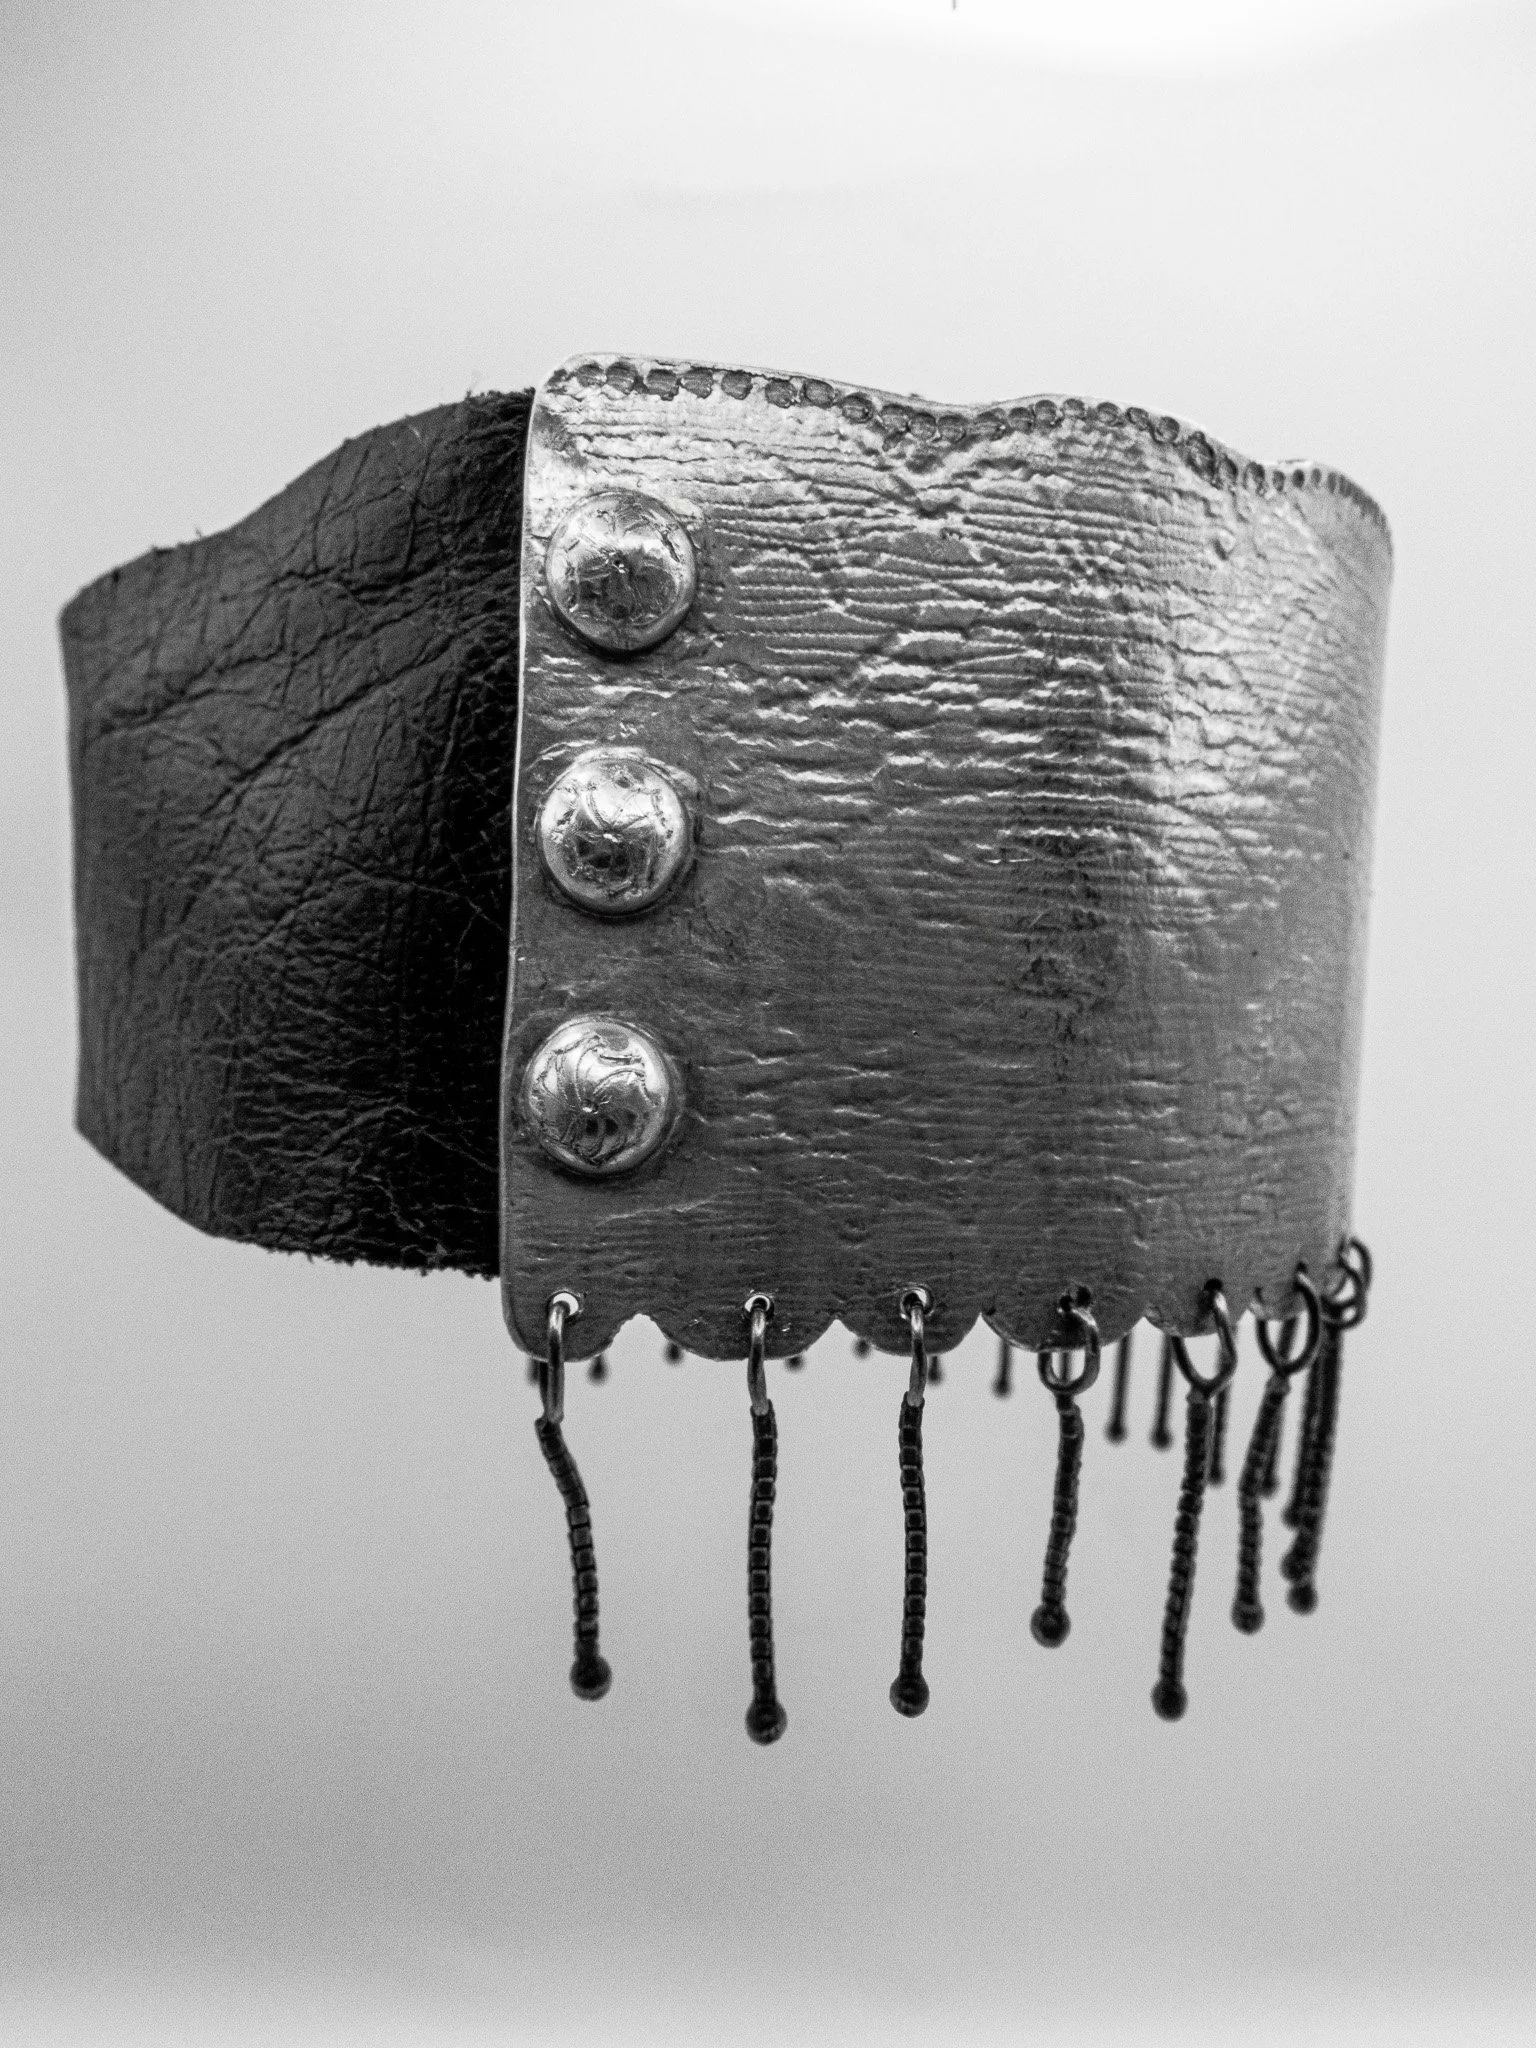
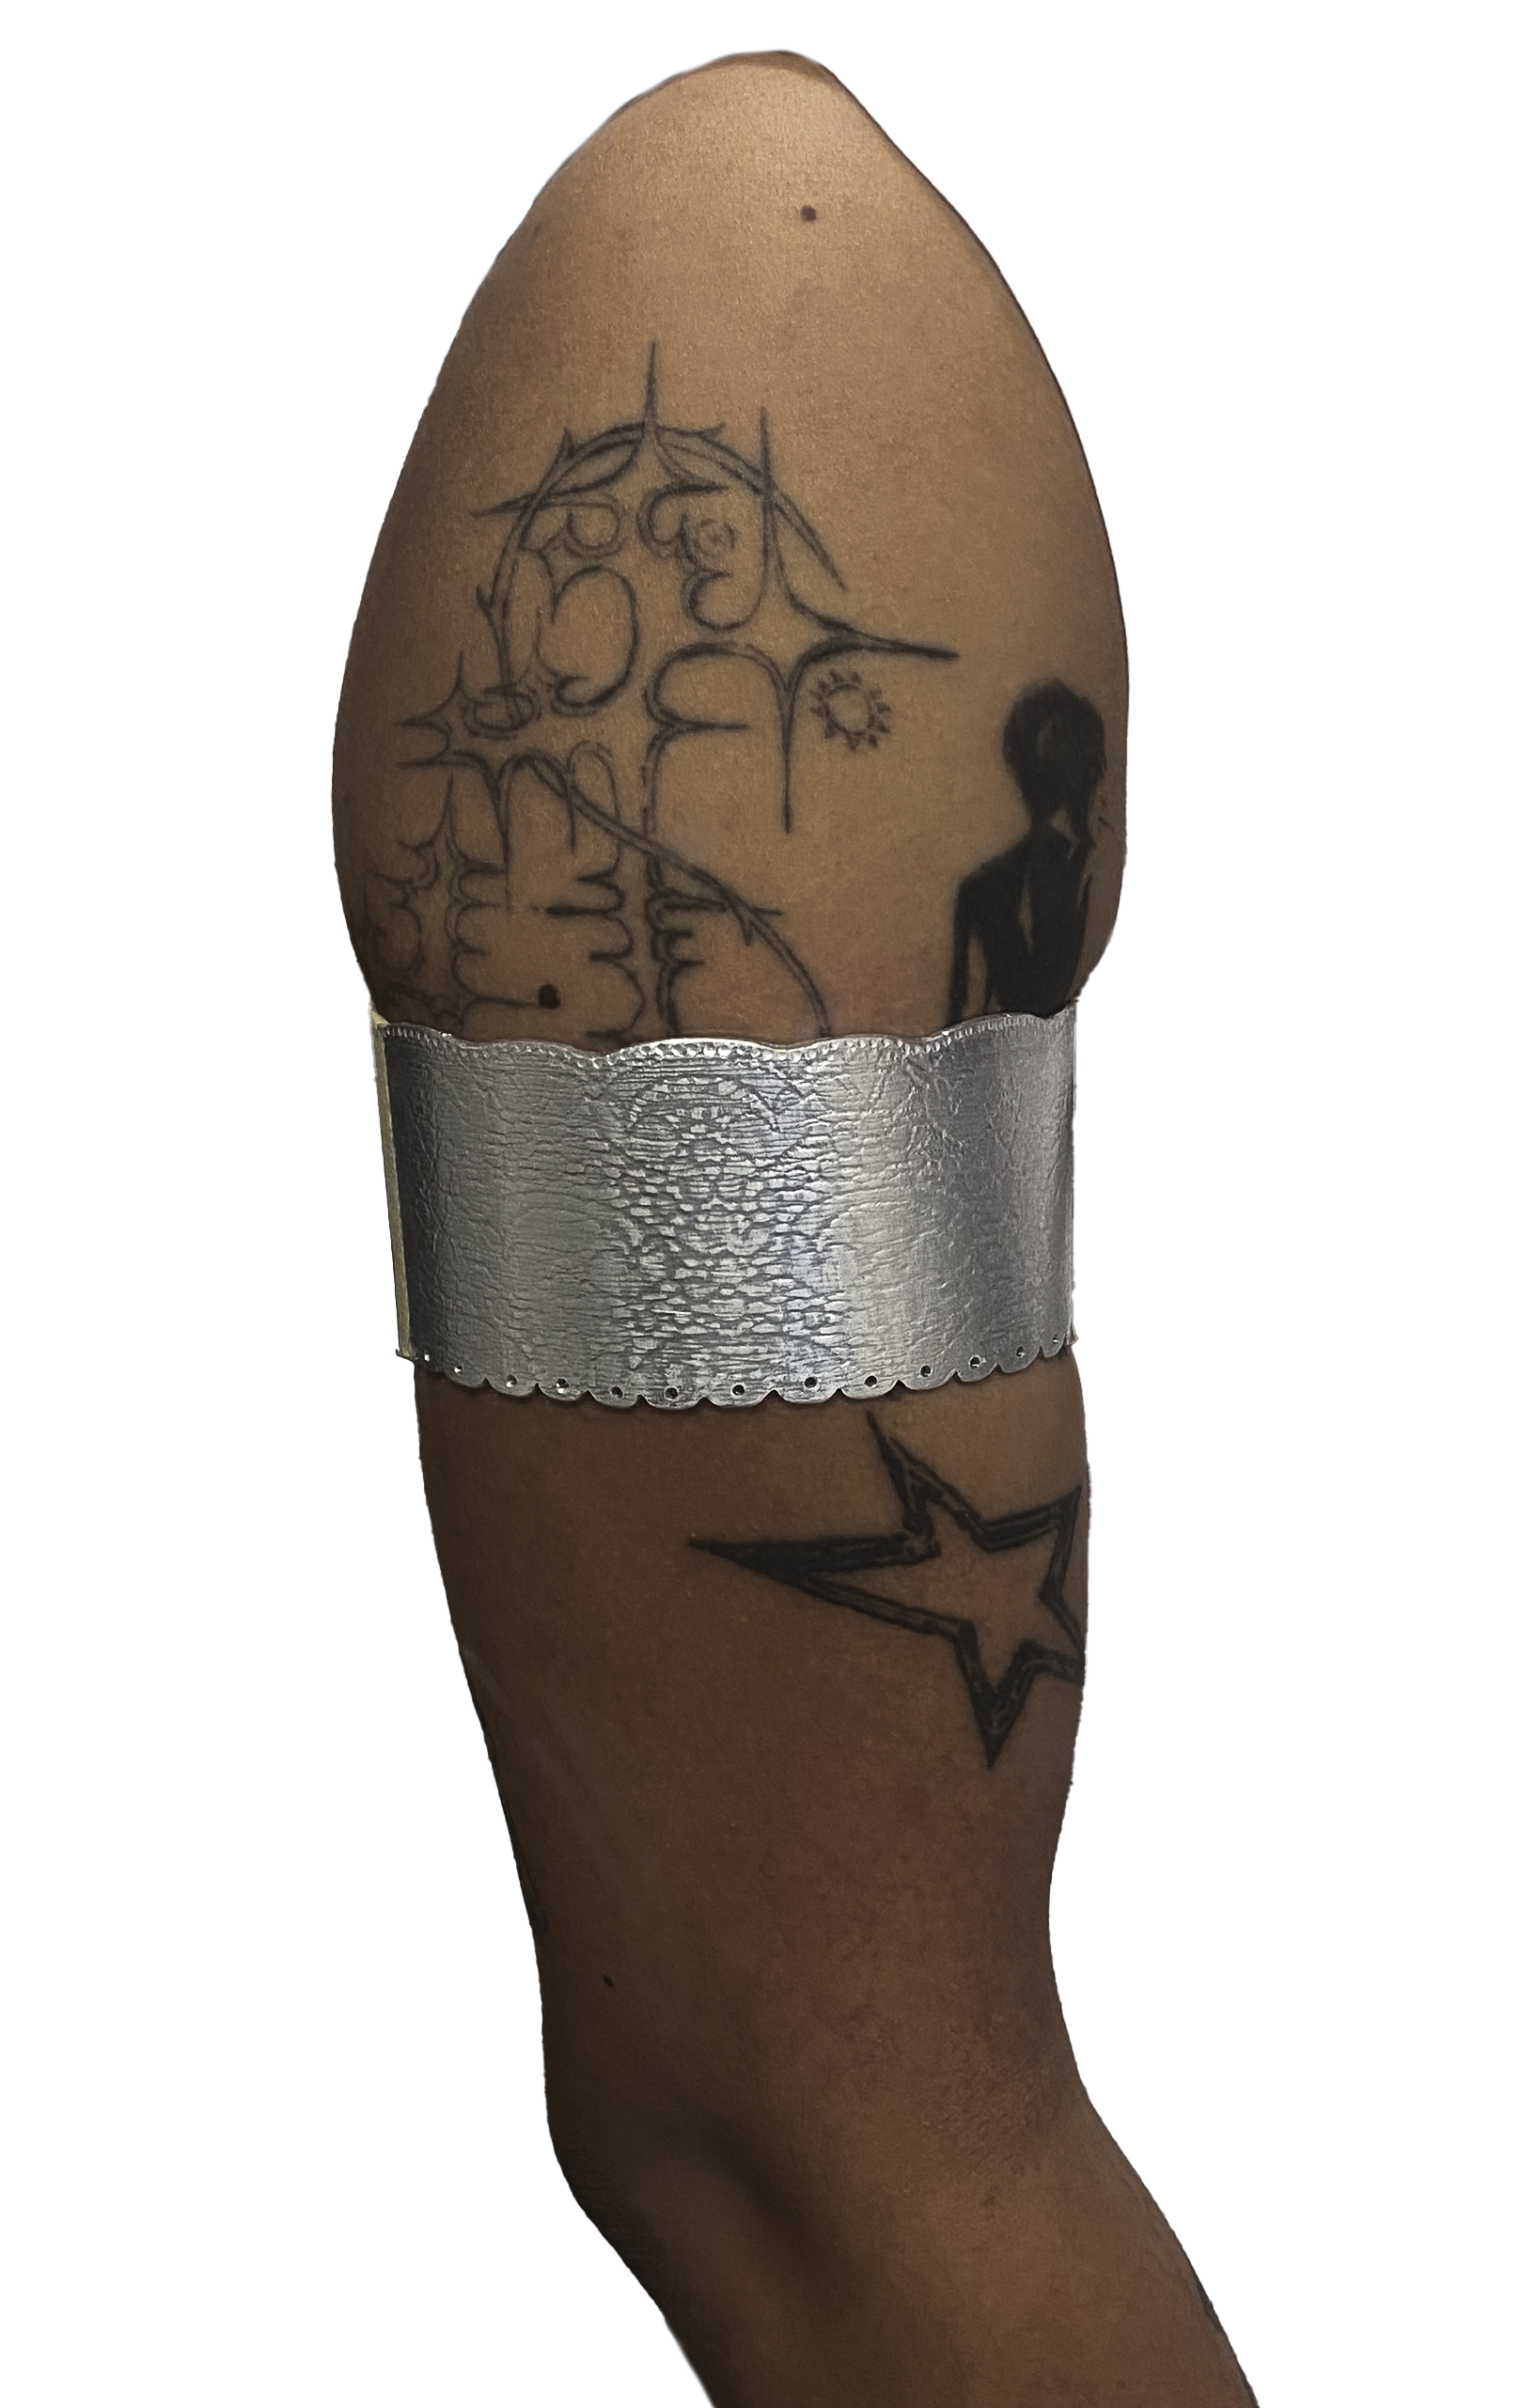
as the first proper piece of jewelry i made, i wanted to Experiment with something that resonated with my textil side. exploring how metal and textile can cooperate and manipulate textures, Techniques and the atmosphere of the jewelry. with this in mind i decided to make an arm cuff that has an aluminium main body with an imprinted lace pattern, black horse-leather back strap, engraved aliminium rivets and Oxidized silver fringes.
PROCESS BELOW showcase PHOTOGRAPHY and editing by me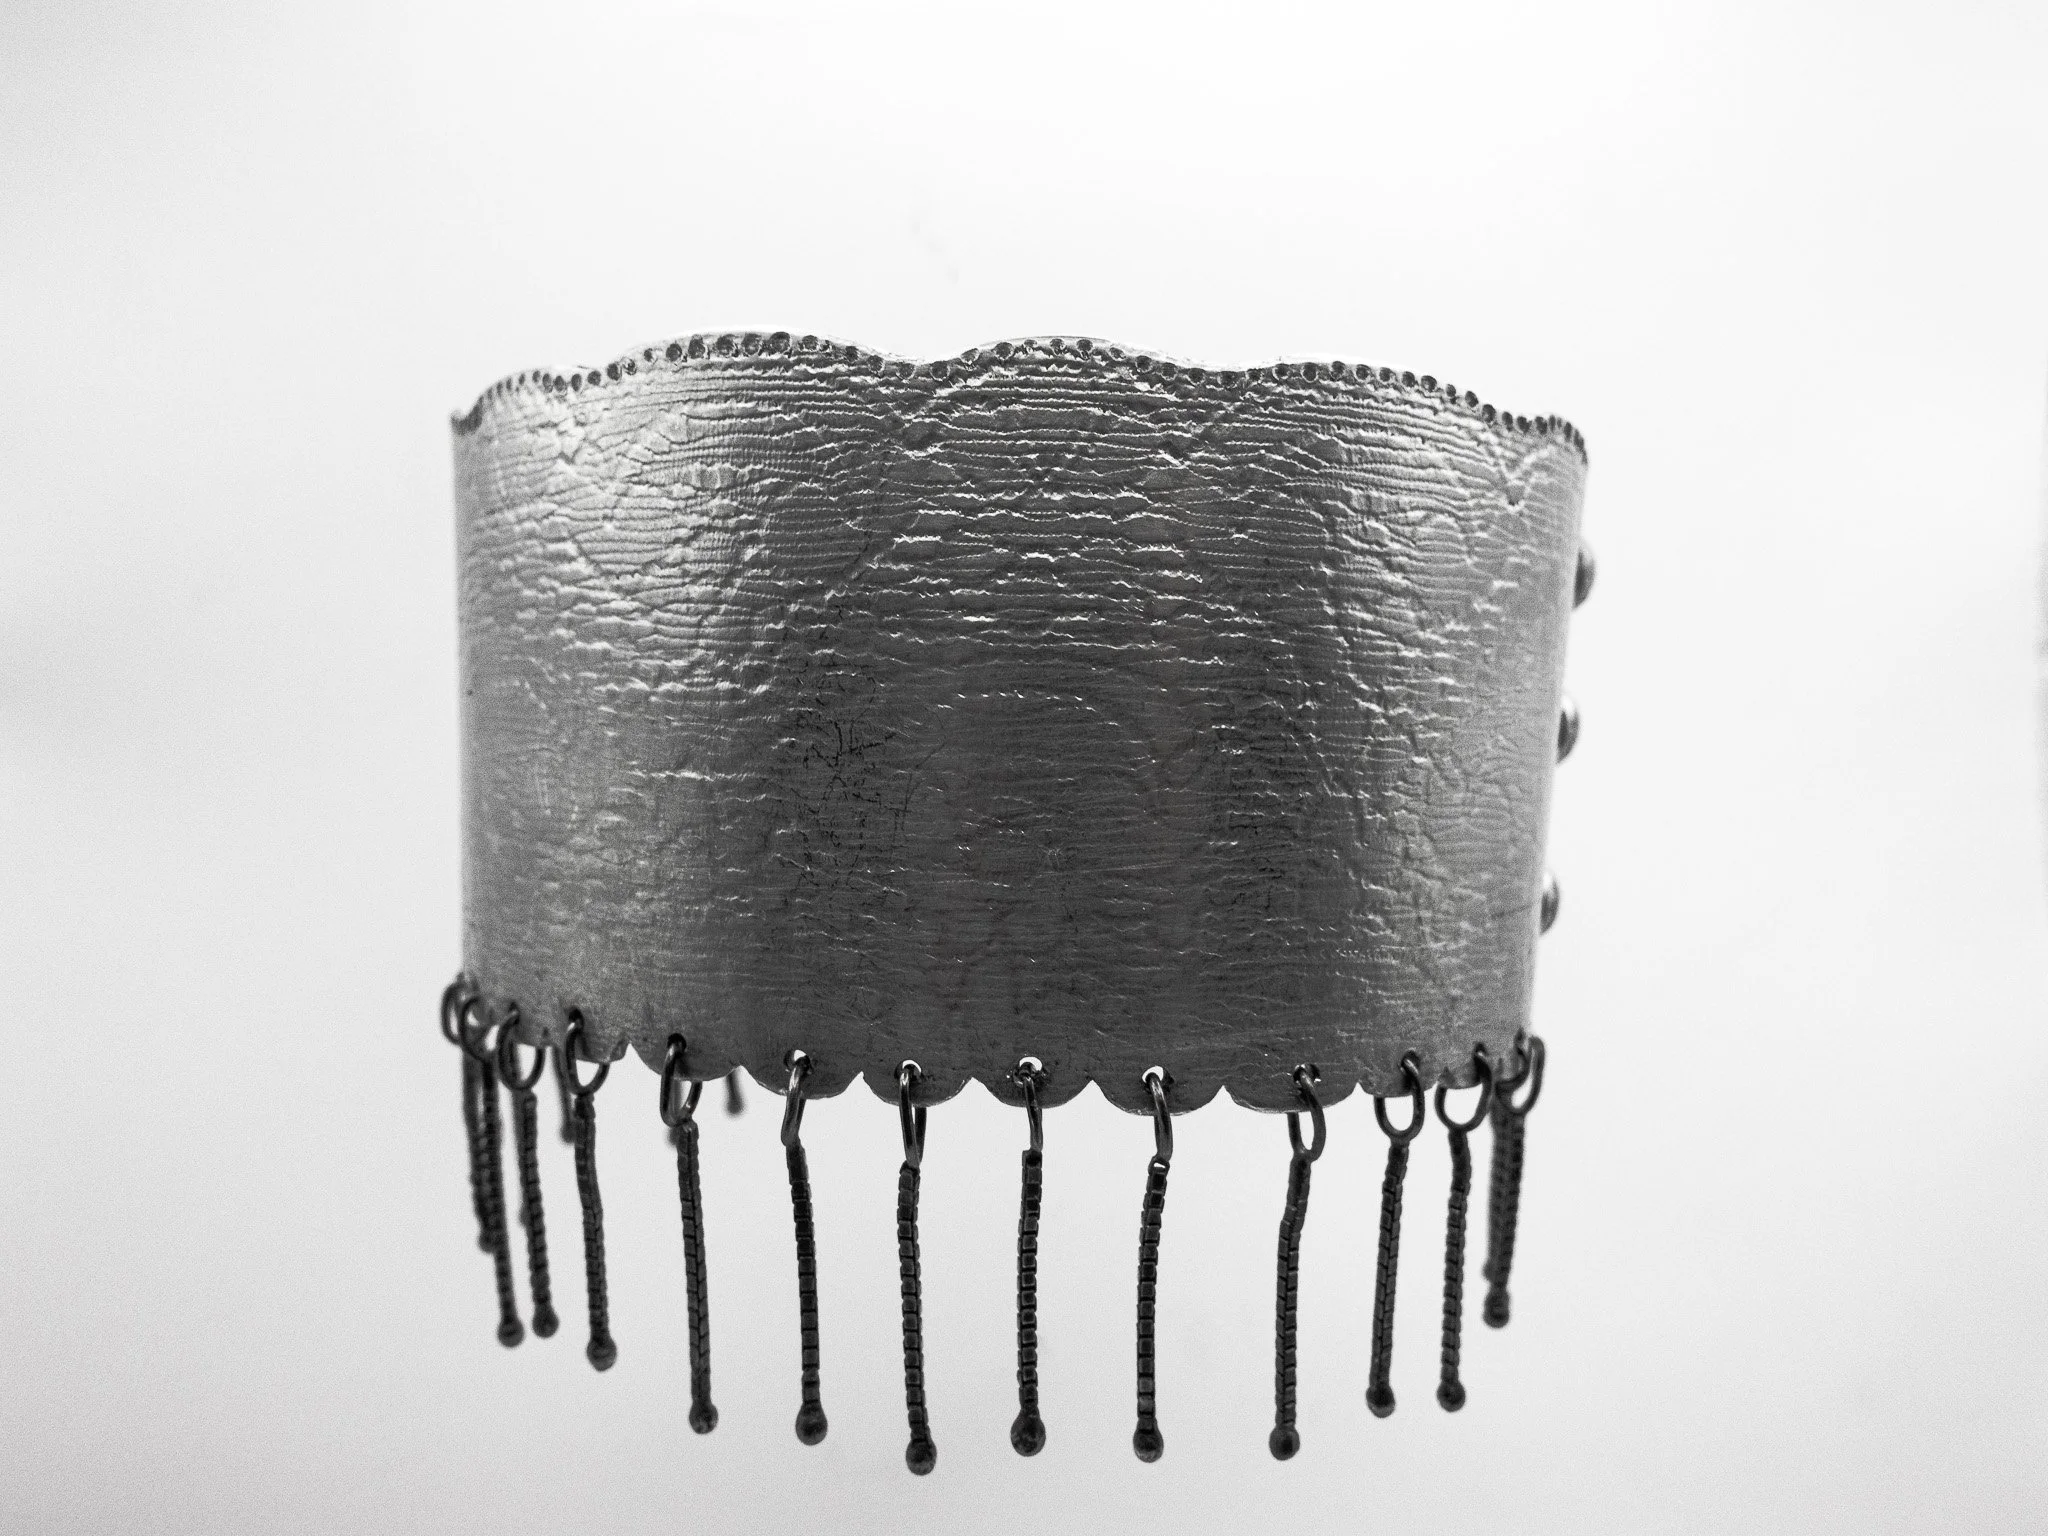
PROCESS
PROCESS
I have a big Interest in how to make patterns and designs on metal Especially in a way that changes the texture and form. so i wanted that to be my main focus coming into this project. Since i already knew that my jewelry was most Likely going to be made out of aluminium due to material costs, i wanted to see if i could get depth without the help of Oxidation that u can do with silver and other metals.
Secondly i wanted to Incorporate leather into my Piece Since i like the way the Hardness and exactness of the metal mixes with the natural and softer leather. how light can affect them differently with their shine, curves etc.
And to keep the pattern and manipulation theme i also wanted to look into leather molding.
FORETHOUGHT
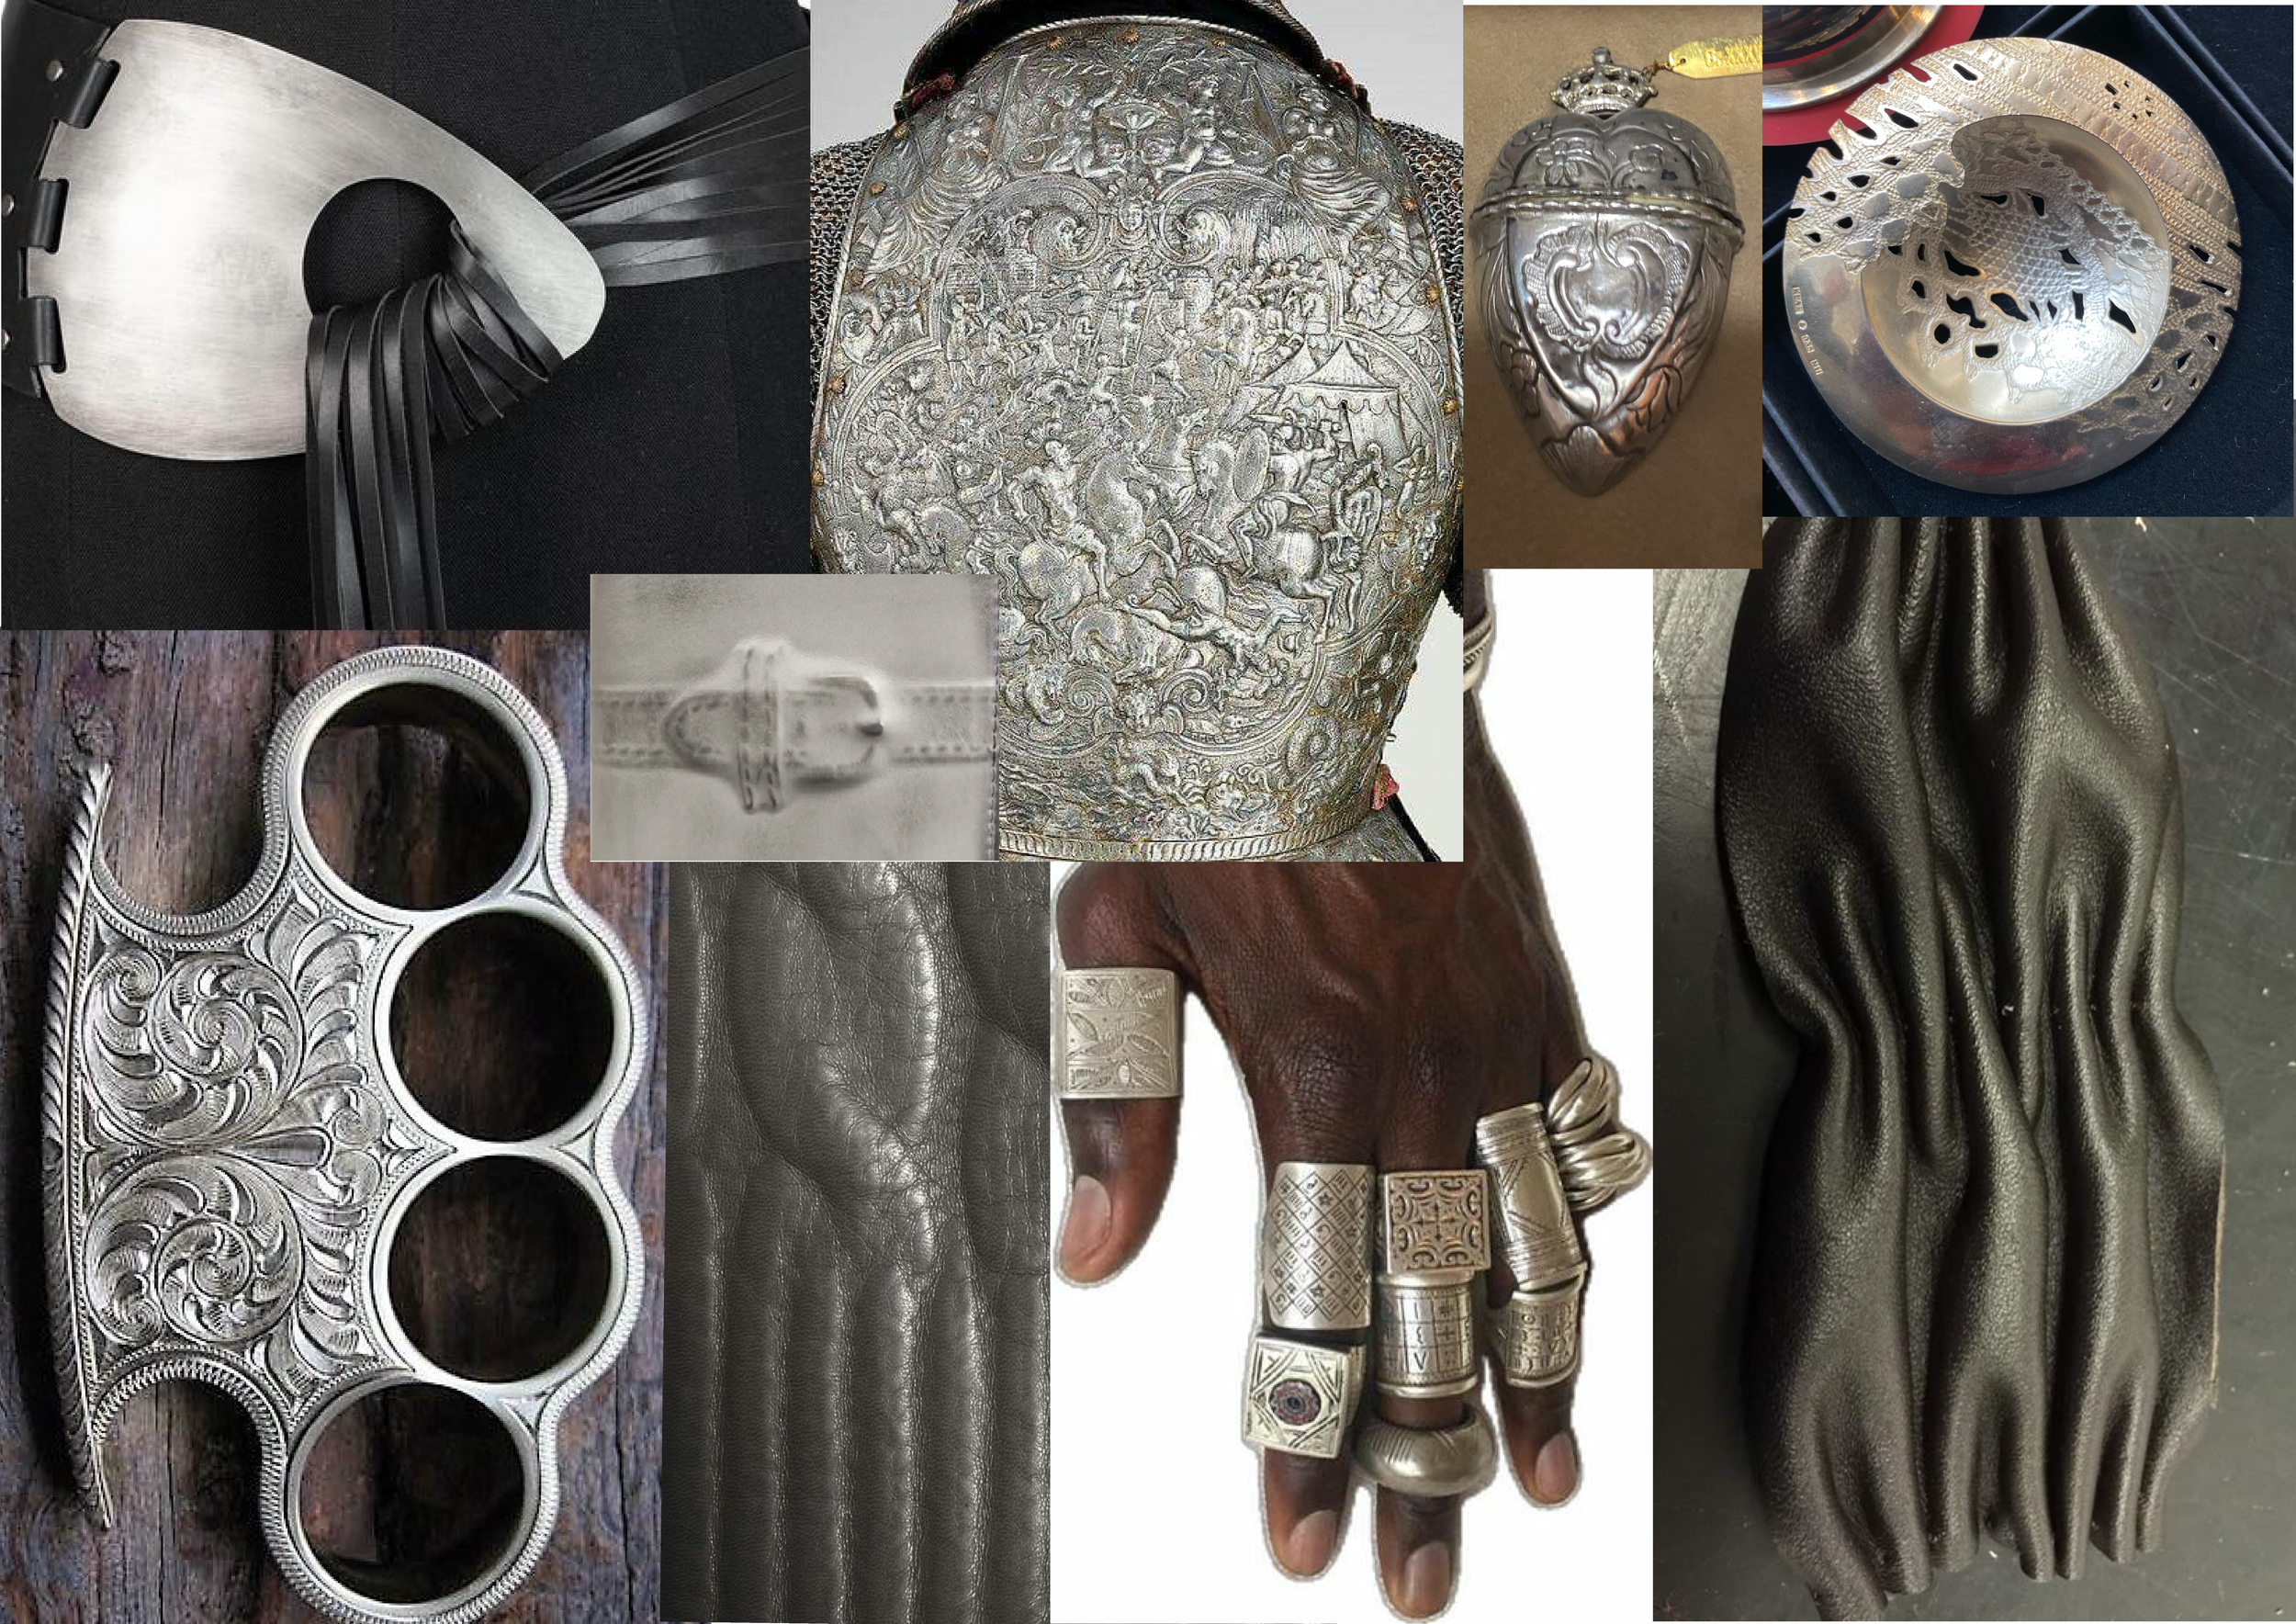
MOOD-BOARD
ENGRAVED
IMPRINTED
SHAPE
TEXTURE
DEPTH
SHINE
LEATHER
ALUMINIUM
SILVER
PATTERNS
MOLDING
COOPERATION
MANIPULATION
key words
SKETCHES
having an idea of what the details would be, i began sketching on the jewelry starting with a kind of brace/ large cuff worn on the forearm with different key elements.
After creating a few sketches i chose to take details from Different designs and make one final design in the Future where i would include them. The reason i did this was to keep my options open During my material tests to see what i gravitated towards.
MATERIAL TESTS
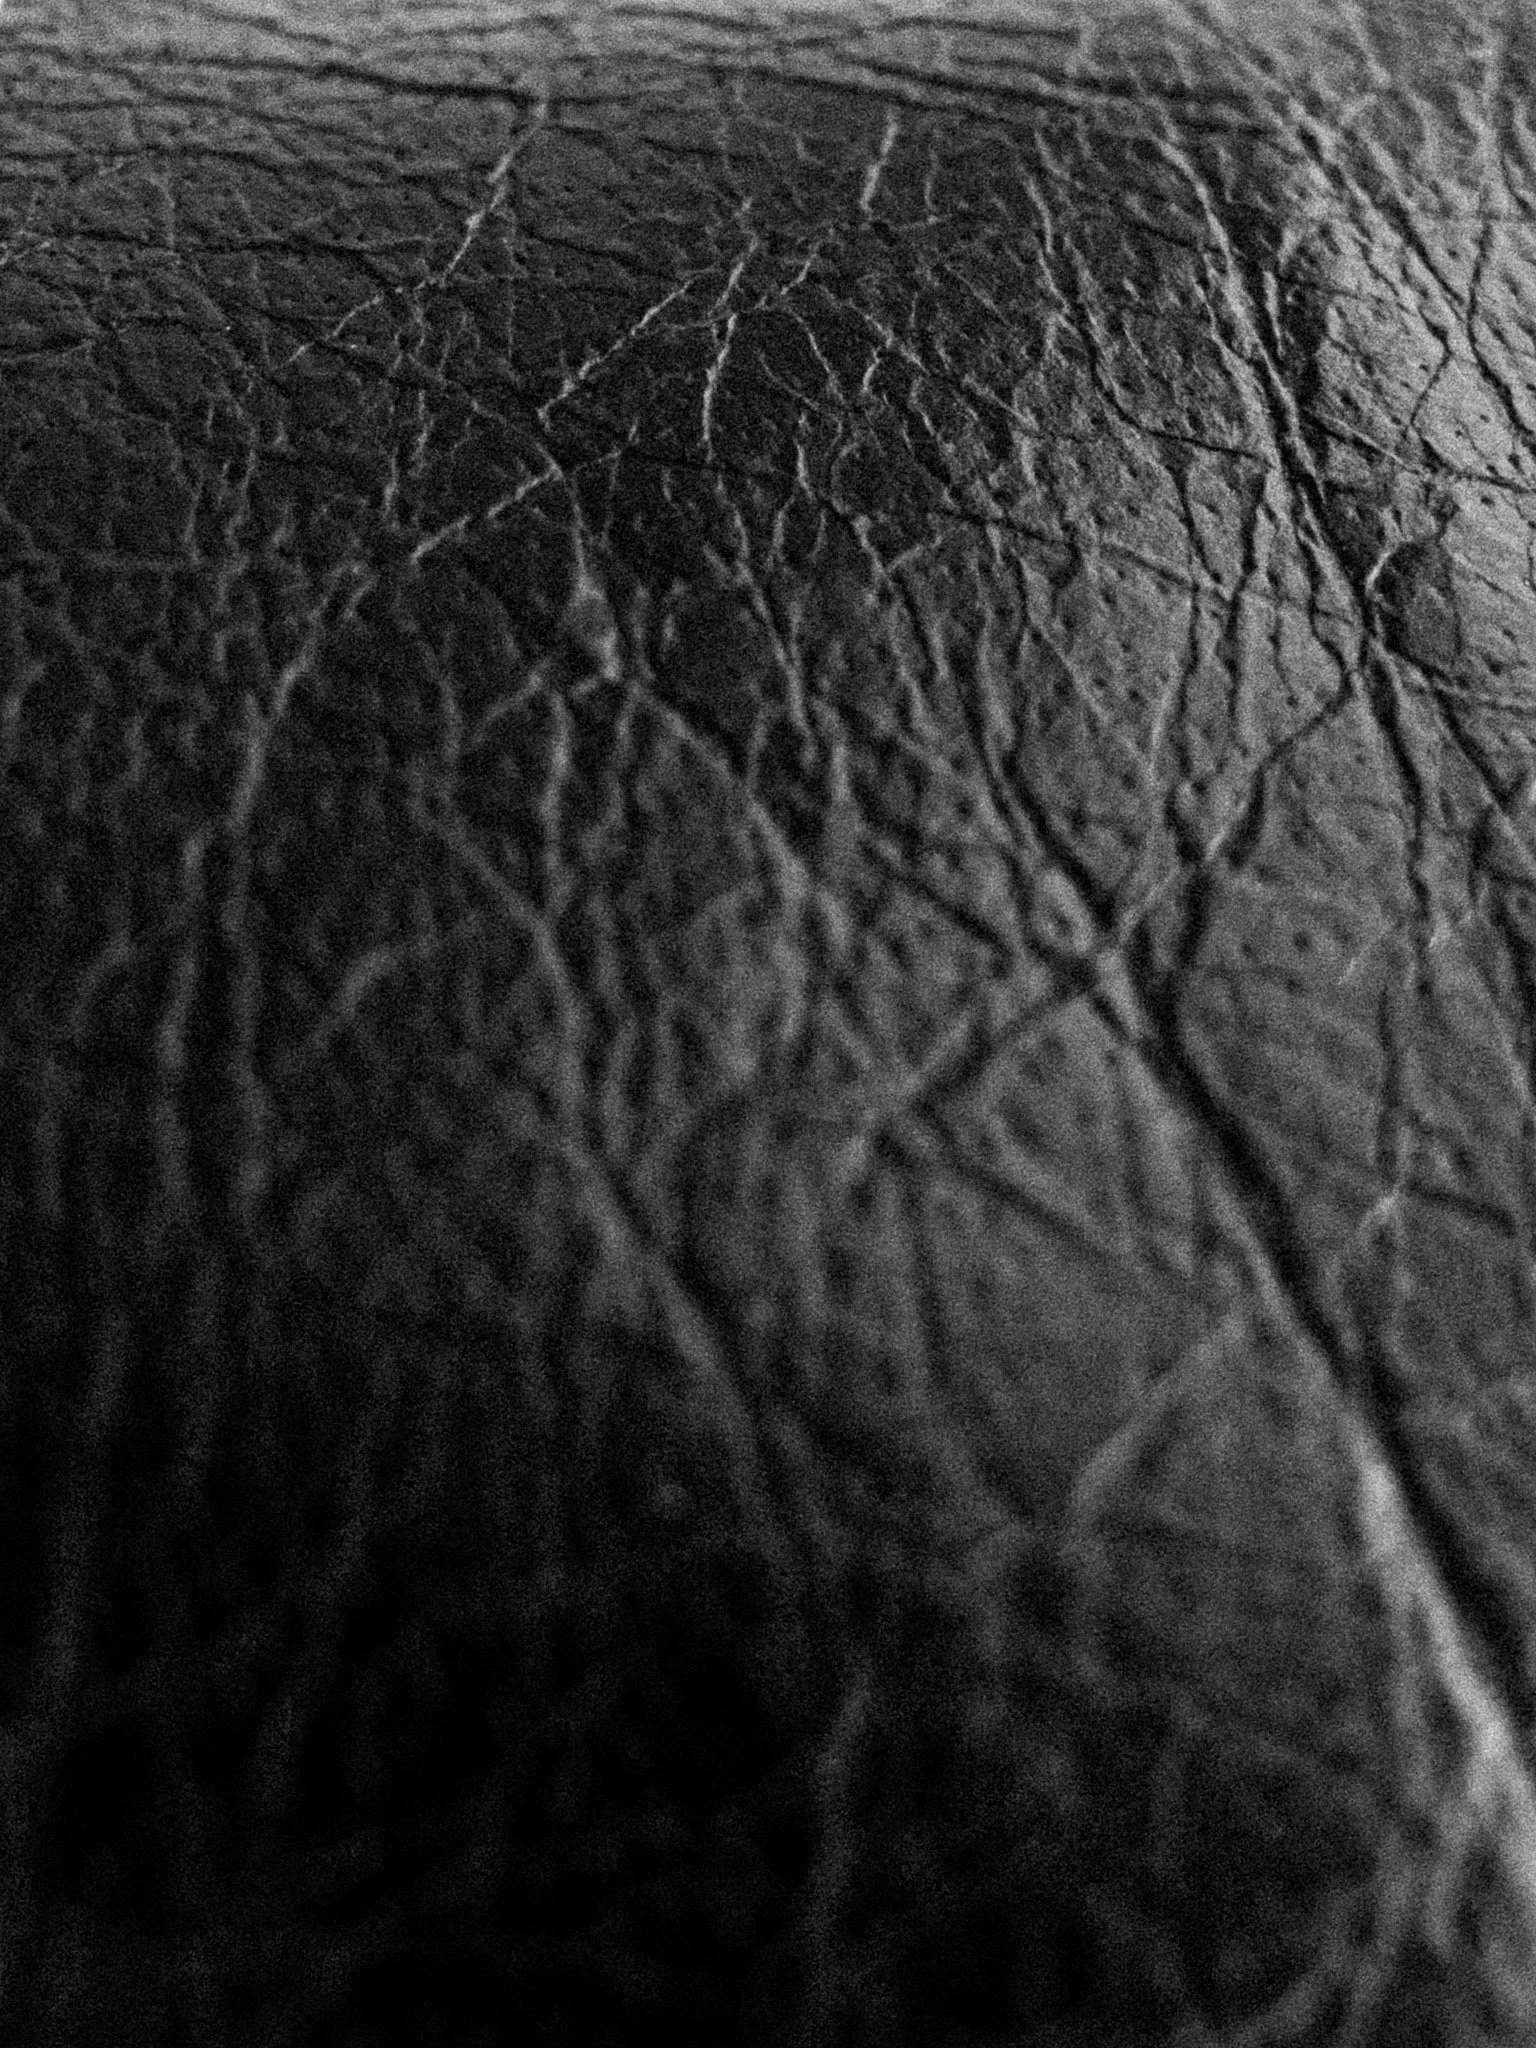
Starting on the material tests i began with the plate metal roller which could press; round wire flat, metal plates thinner most importantly press shapes onto plates as long as the metal is softer than the shape. trying this i bent Iron wire into random shapes and annealed two Aluminium plates. Creating a “sandwich” with the wire In Between the plates i taped them and pressed them. With the sandwich method i could get two plates with the exact same print at once but also protect the Machine at the same time. The result was good but Surprising being that the shape Transferred perfectly even more exact than Thought. Although the plates bent upward when being pressed due to the sandwich not being secured together enough.
for The next test i tried the same method. this time seeing how close i could get the wire and still get the full detail. The result was that the roller got full detail no matter the Closeness or Thickness of the shape, just needing a few more and tightly pressed go-throughs.
I also taped the sandwich more this time, making it so the two plates had less warping and reduced the risk of double pressing the shape onto the plate. due to having A Lot of tape and Pressing this test tighter, it also pressed the painters tape i used to secure the plates together onto the plate itself. Foreshadowing the amount of detail i could get even with minimal detailed shapes.
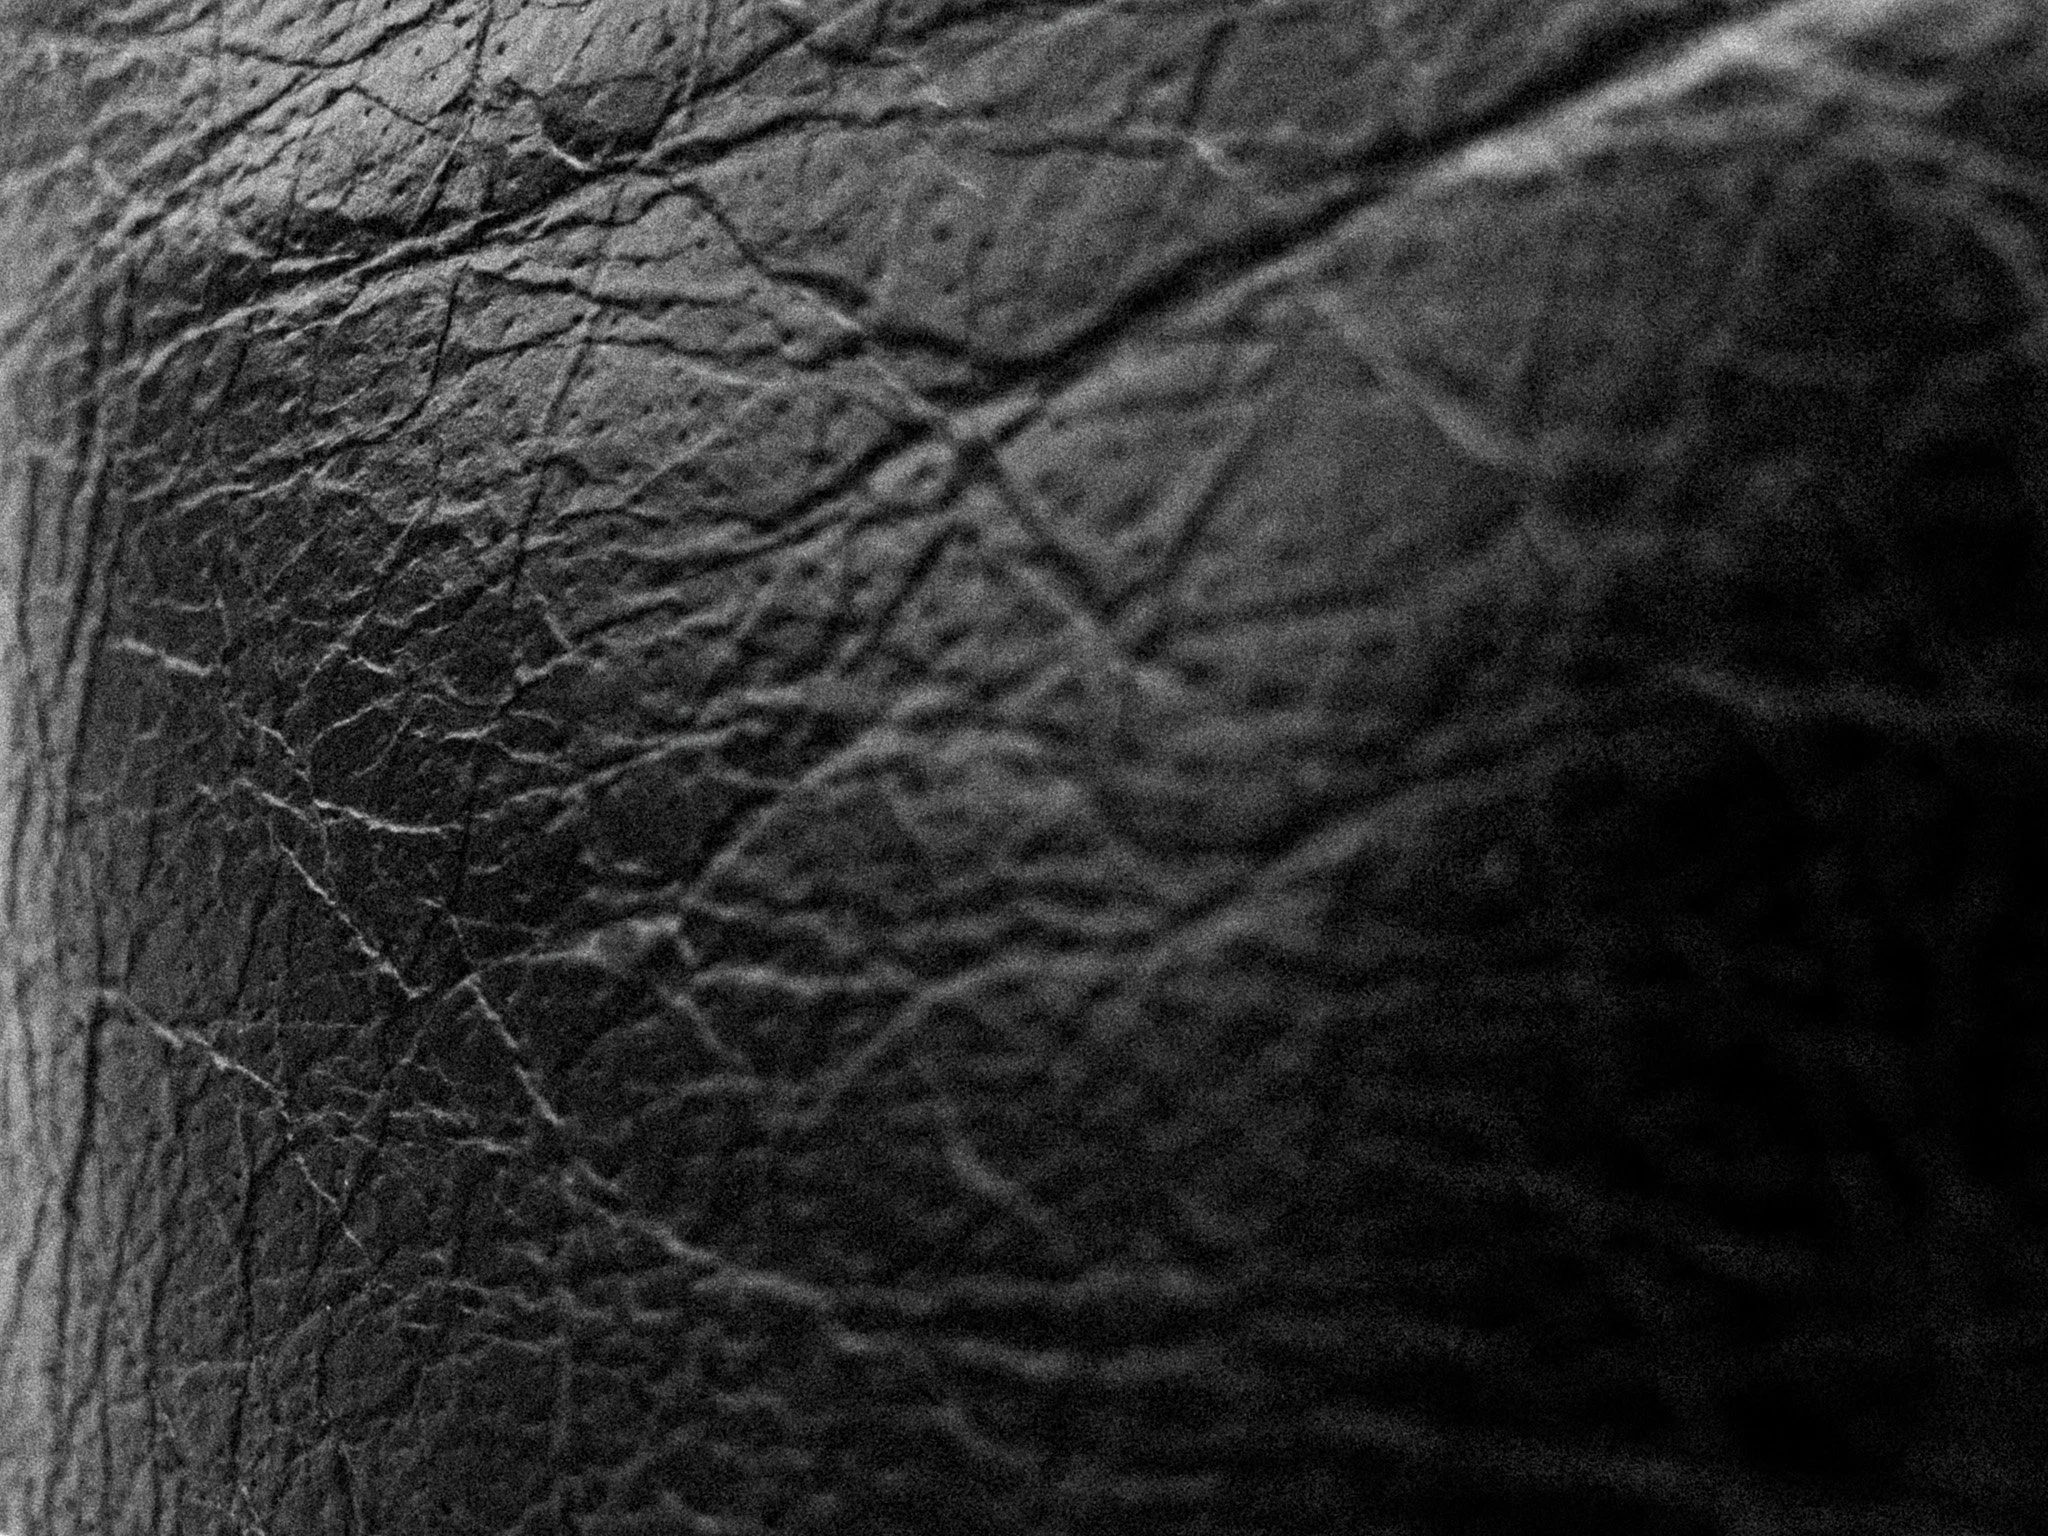
with the results from the first two tests tried pressing fabrics specifically two different types of lace.
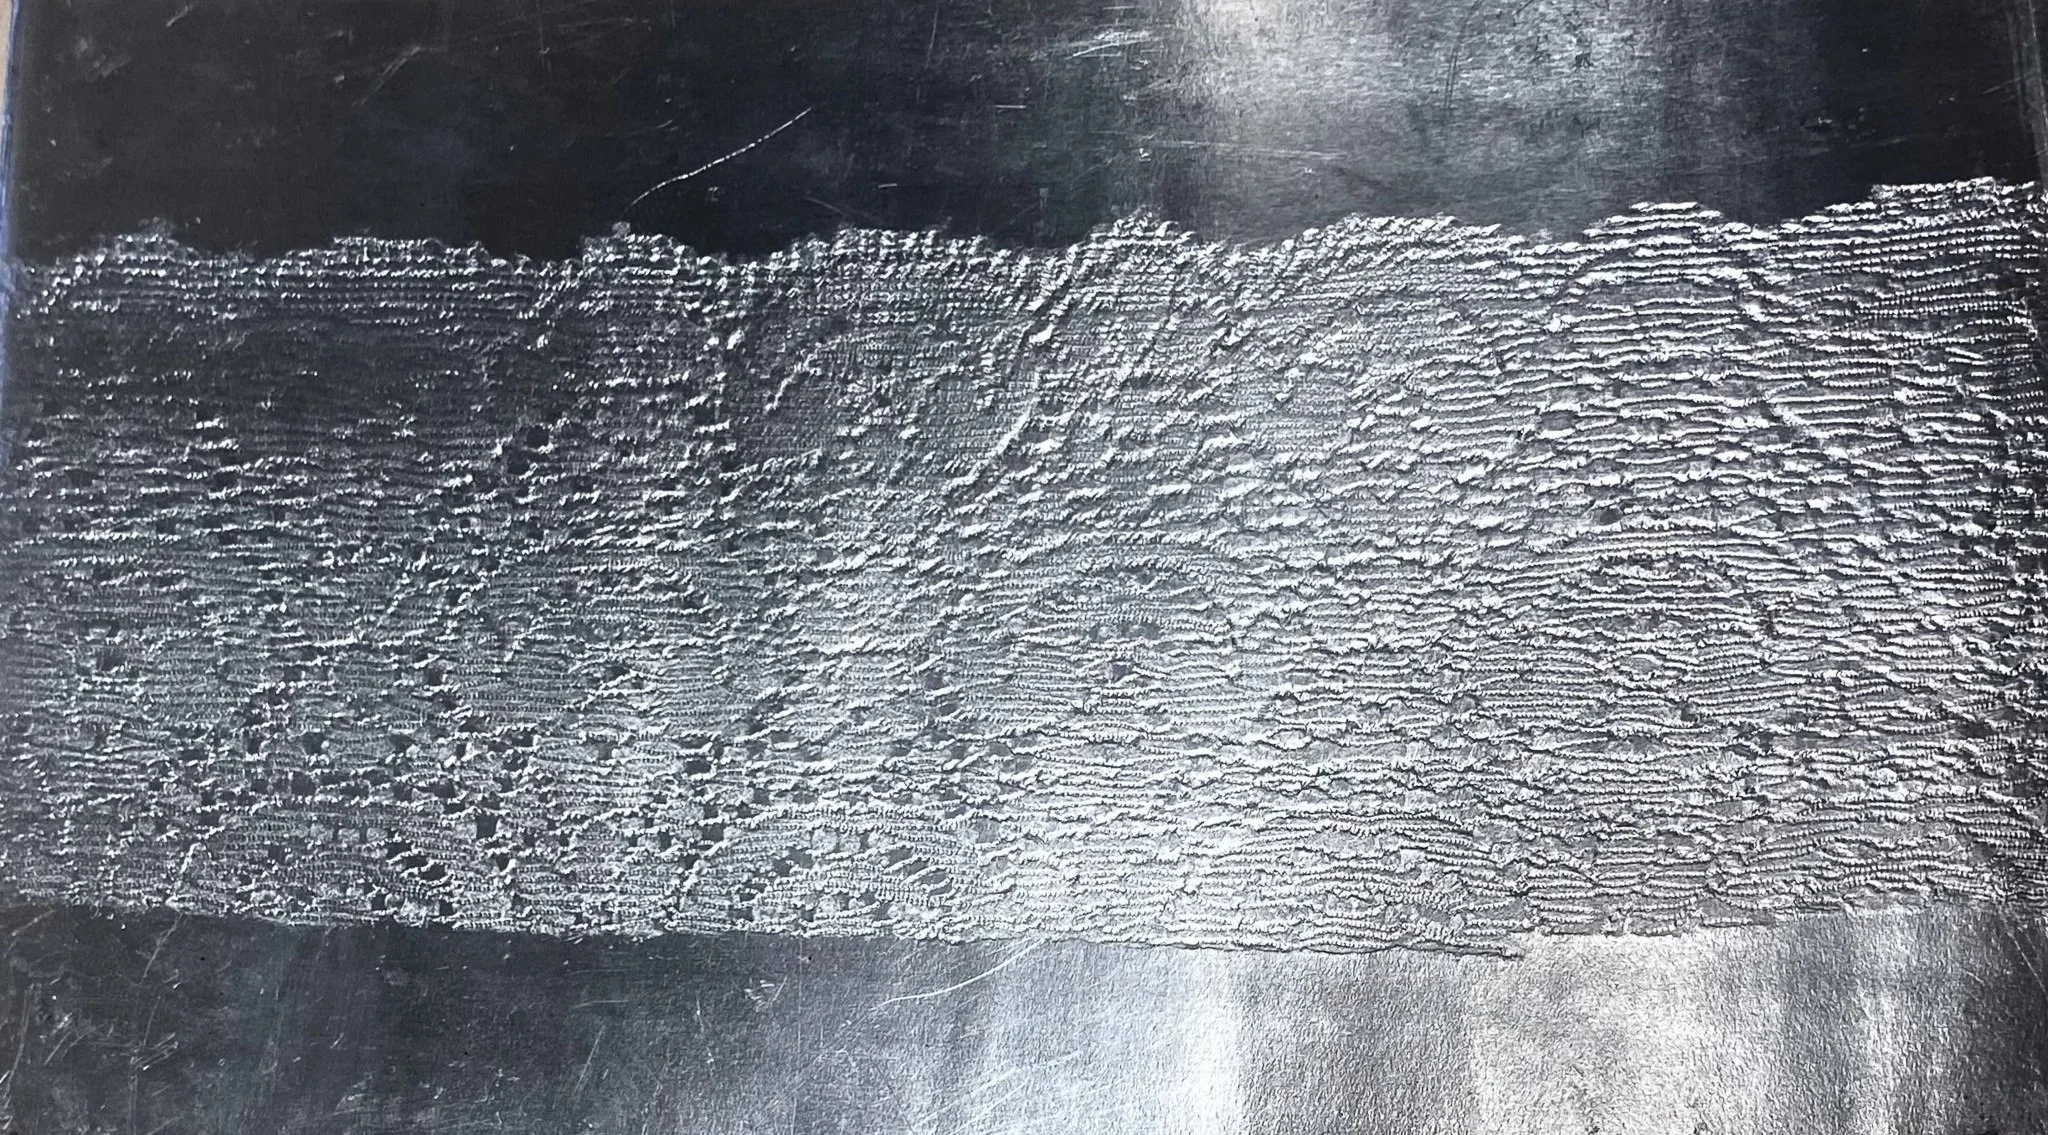
for the first test i tried pressing was a thinner and more spaced out lace seeing how much clarity i could get. Gluing the lace In Between the plates before taping them. helped majorly in The result since double pressing had less Chance of happening. The detail of the lace Transferred almost fully, giving a clear image, only missing a few small details.
with The second test i tried a thicker lace with the Details threads less compact. This resulted in the lace transfering pretty well but not giving clarity to the lace pattern it self, giving it the look of a snake print instead. Only having the rose be Barely Visible in precise angles.
12taking a step back from the plate roller, i tried engraving with a Dremel and Diamond tipped engraving bits.
having two Aluminium plates 1 being annealed and 2 not. trying a variety of bits for different shapes and depths, i noticed that the annealed plate was easier to work with making tracks easier and slipping less, compared to the non annealed one having a tendency to make the engraving Bit slip and scratch the plate or take away Unevenly.
Although The result was good for a first test the time it took too engrave a ca a5-a4 page was to Long. Making it not viable for this projects deadline to have it as the main Detail. But great for enhancing Detail in Smaller areas.
12
1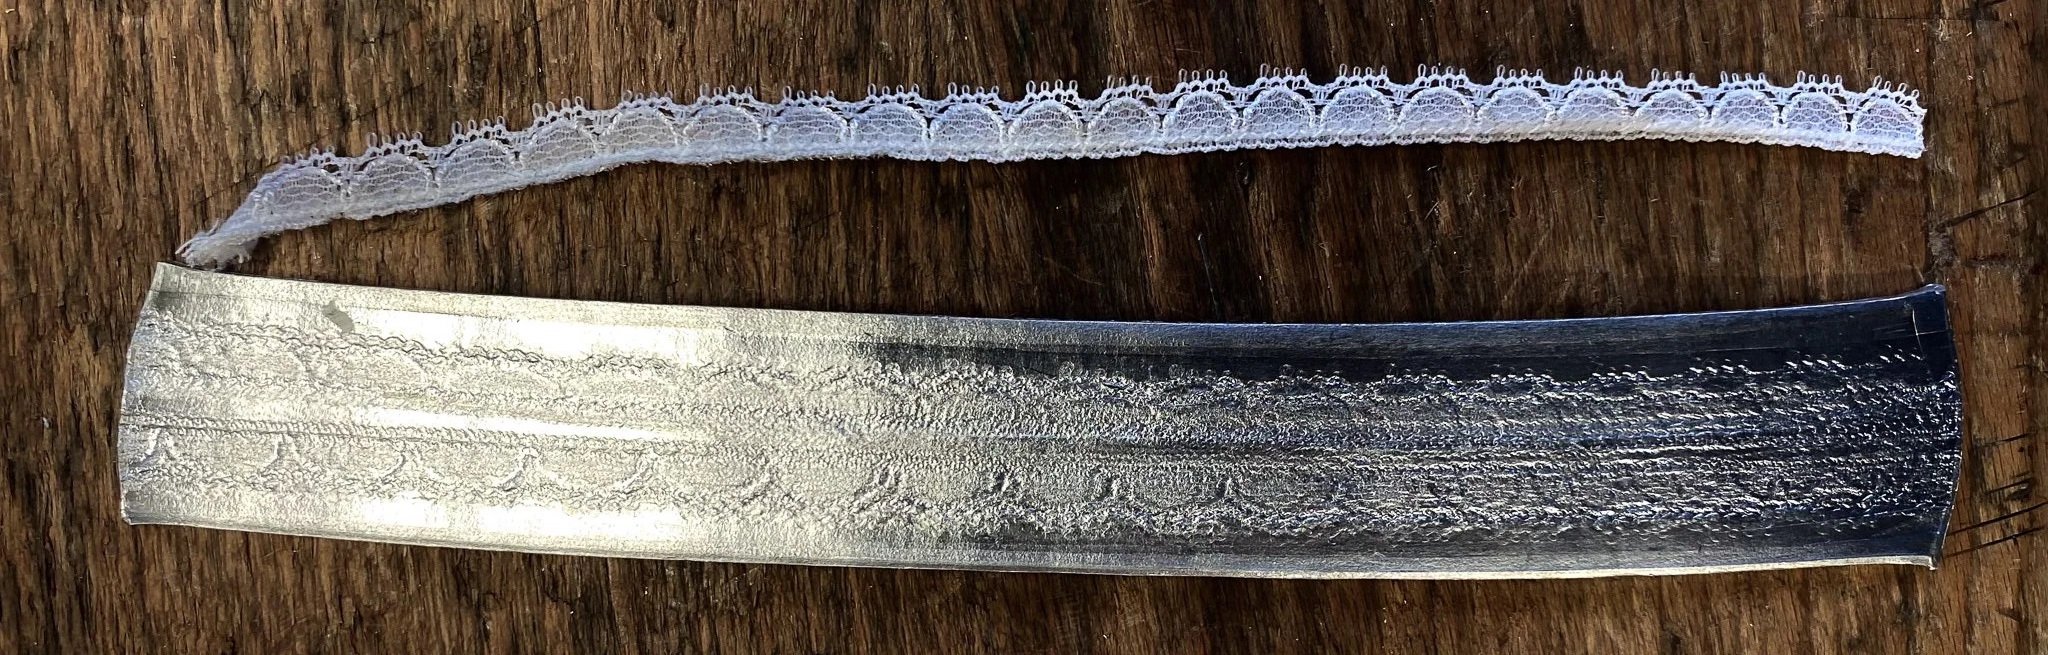
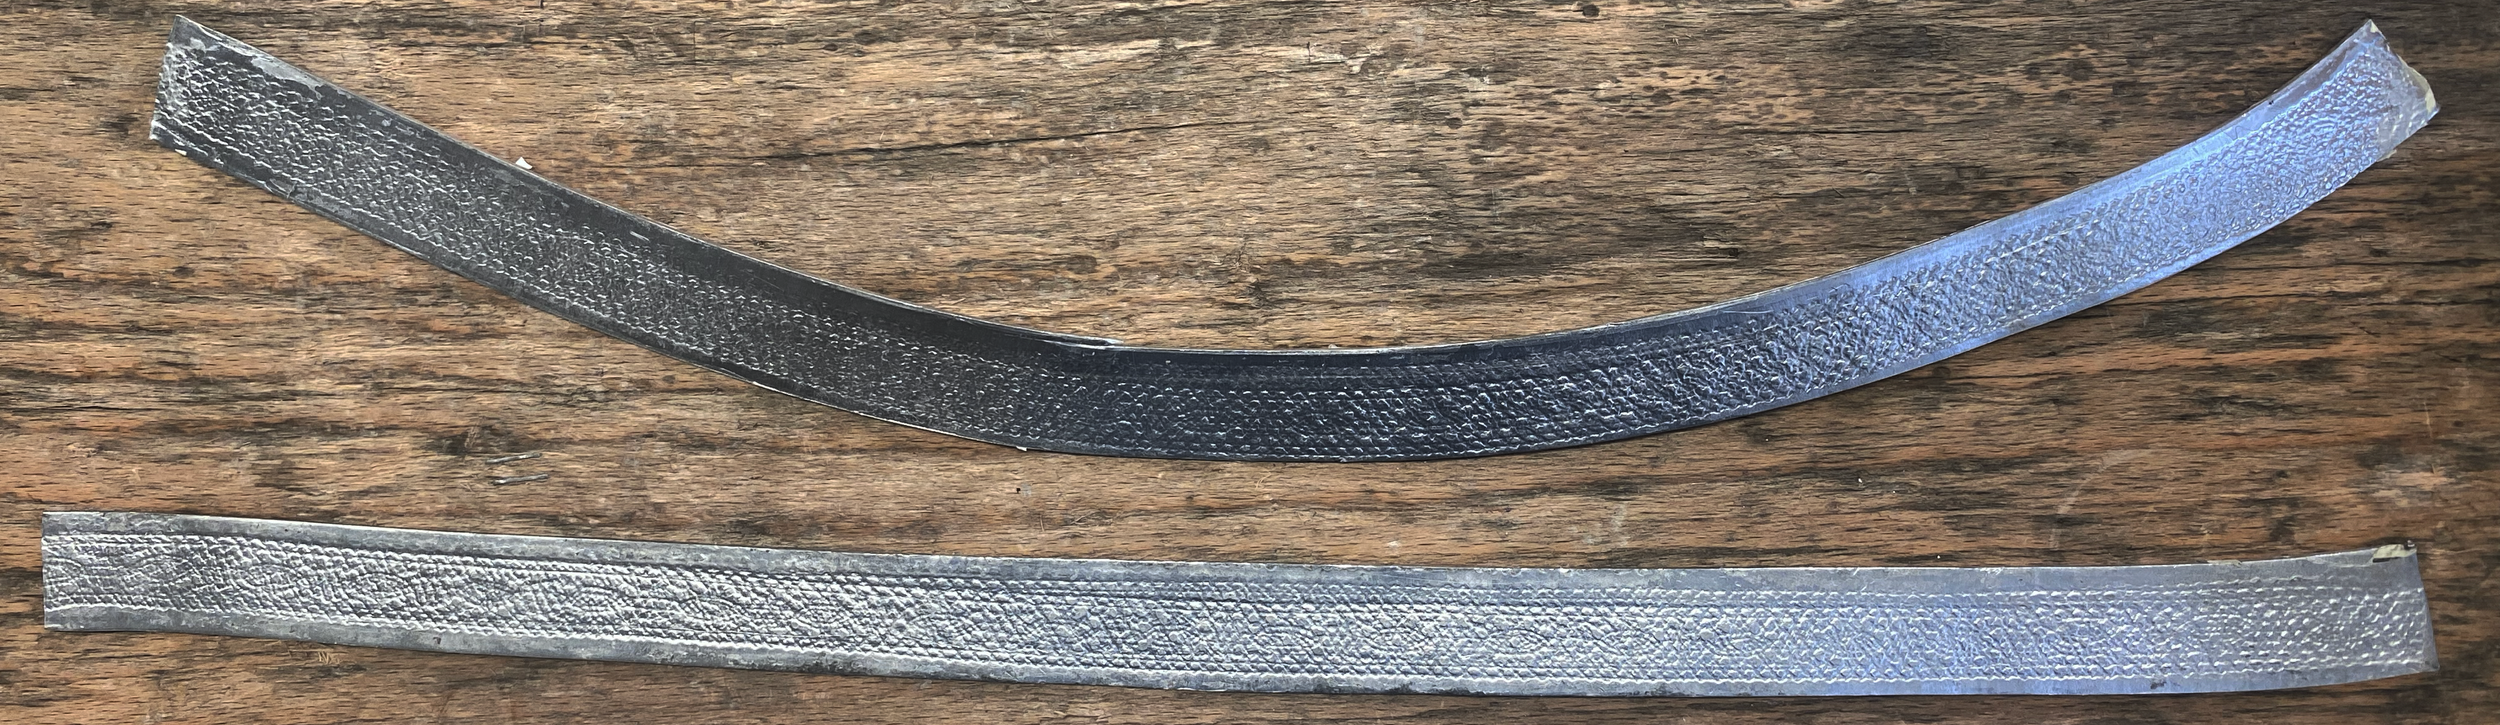
2as a last material test before making my Jewelry i tried pressing two skinny and longer lace fabrics, one thicker and wider spaced And the second one a thinner and less Detailed.
The first lace transferred well making a more spaced out pattern better for imprinting compared to a tight pattern. a Problem that Happened with the longer plate is that it would warp not just upwards but to the side, even if the shape inbetween is just a little of center. This was a problem that had to be resolved by annealing the plate after pressing and hammering down the bend, Which became a Tedious process.
the second lace also transferred well but Since the Details are so close the imprint had less Clarity and resulted in another snake skin like look. also trying a shorter strip it resulted in negating the Sideways warping exponentially.
MAKING THE JEWELRY
After i felt done with my testing, i decided to change the placement of the Piece from the forearm to the upper arm, creating a cuff with a leather back and fringes.
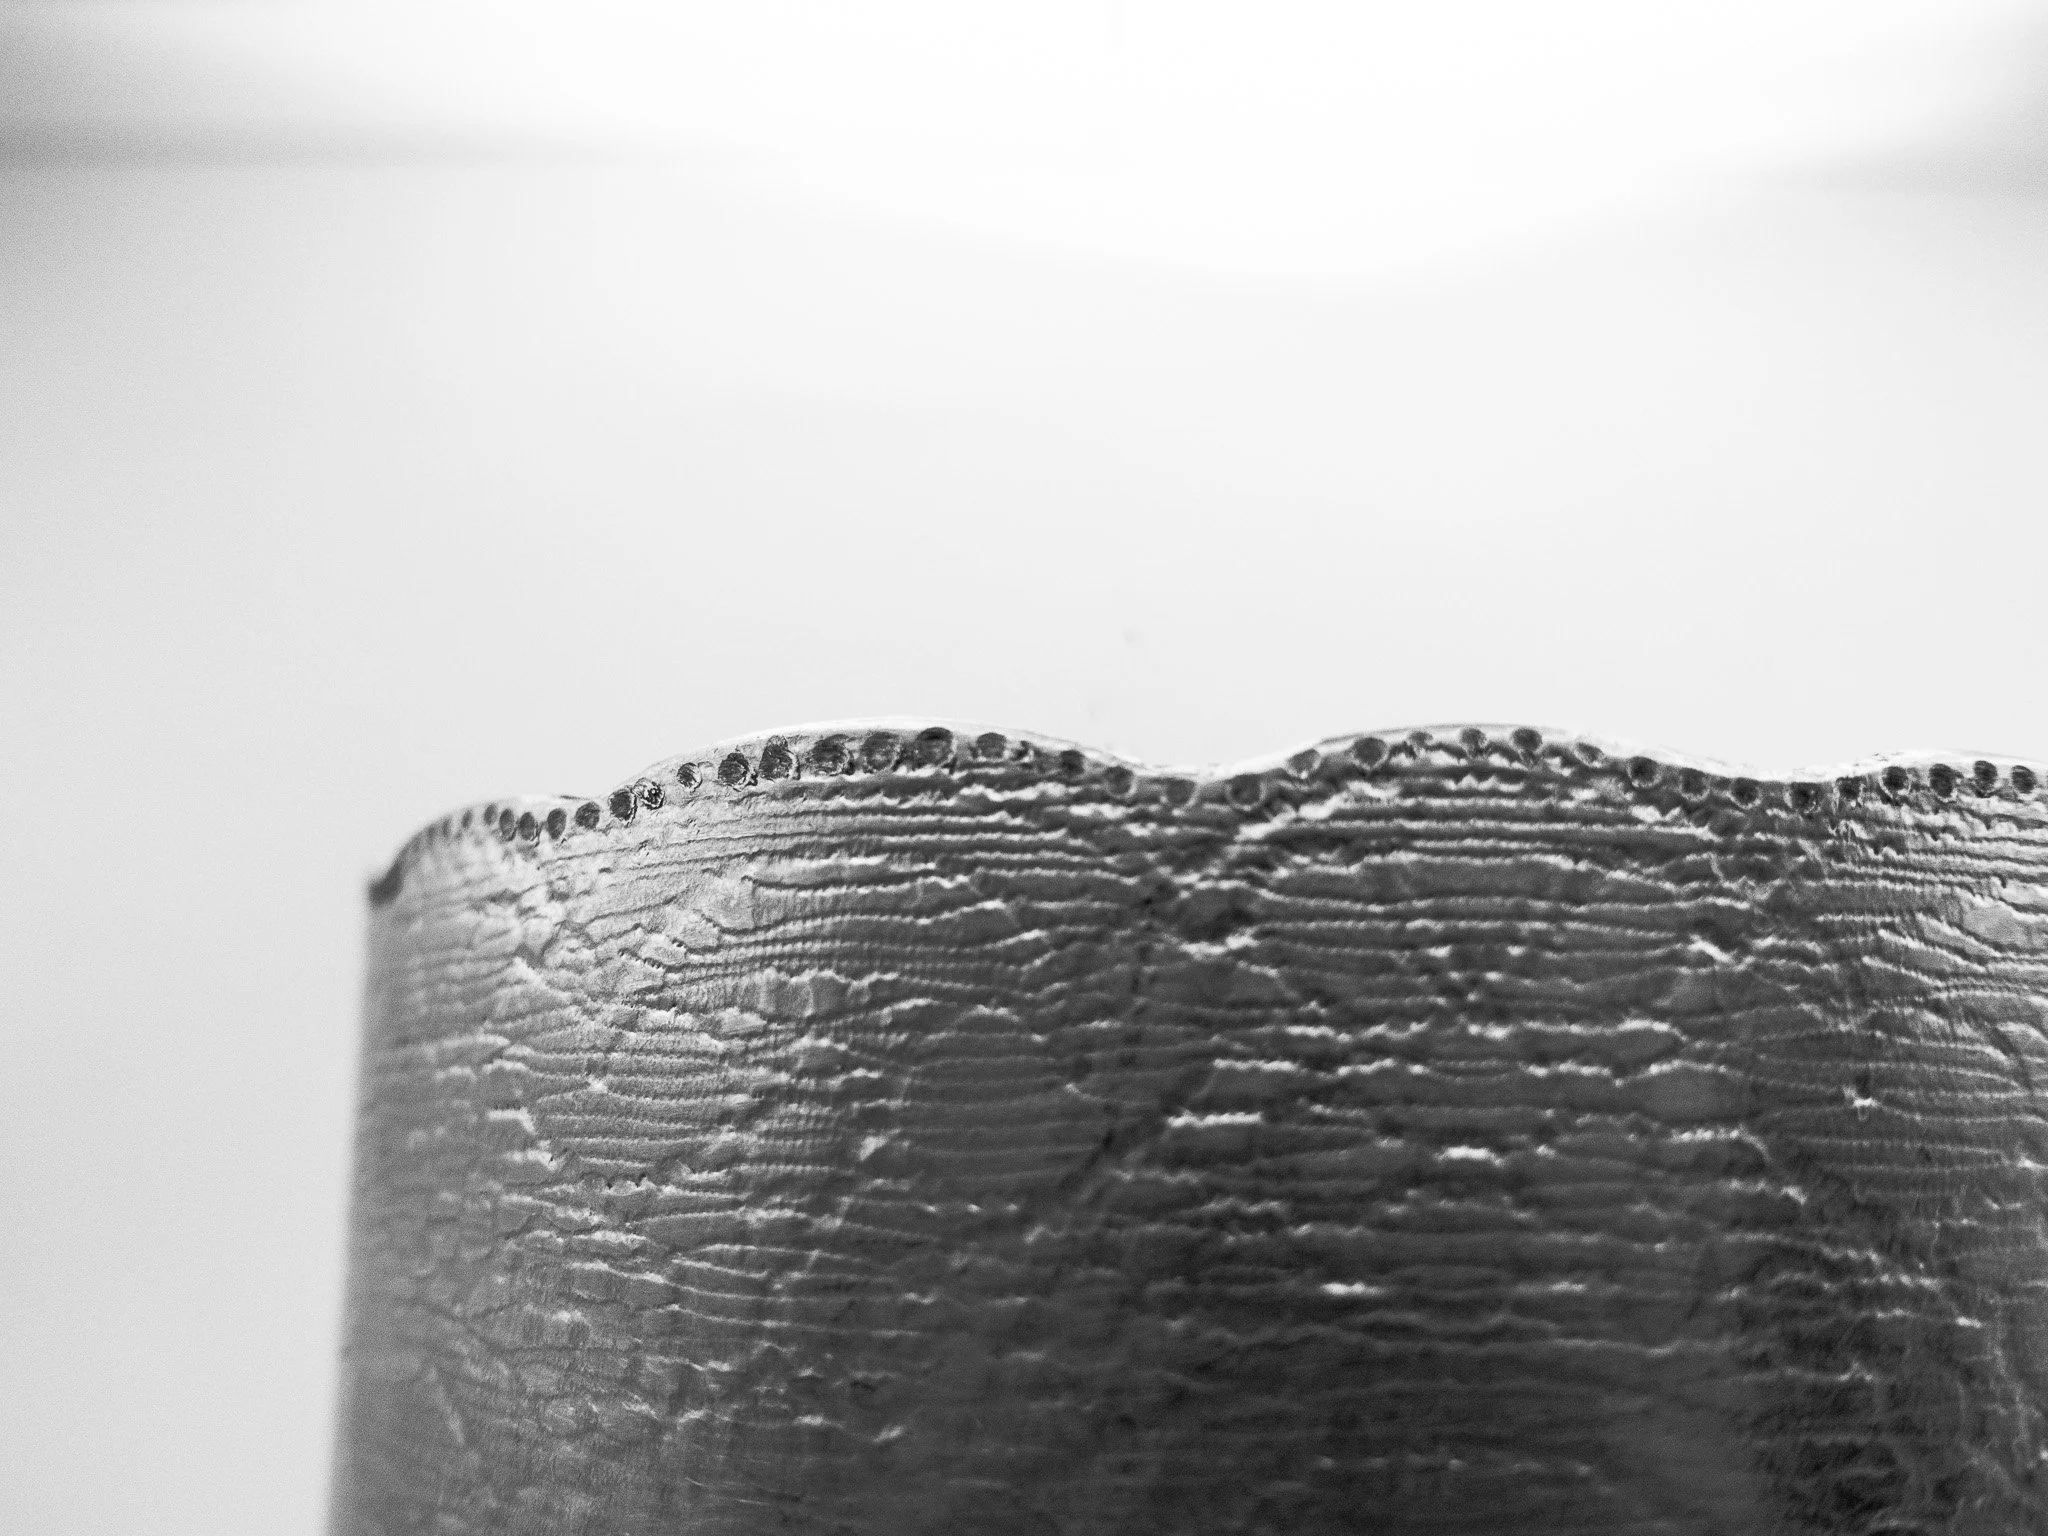
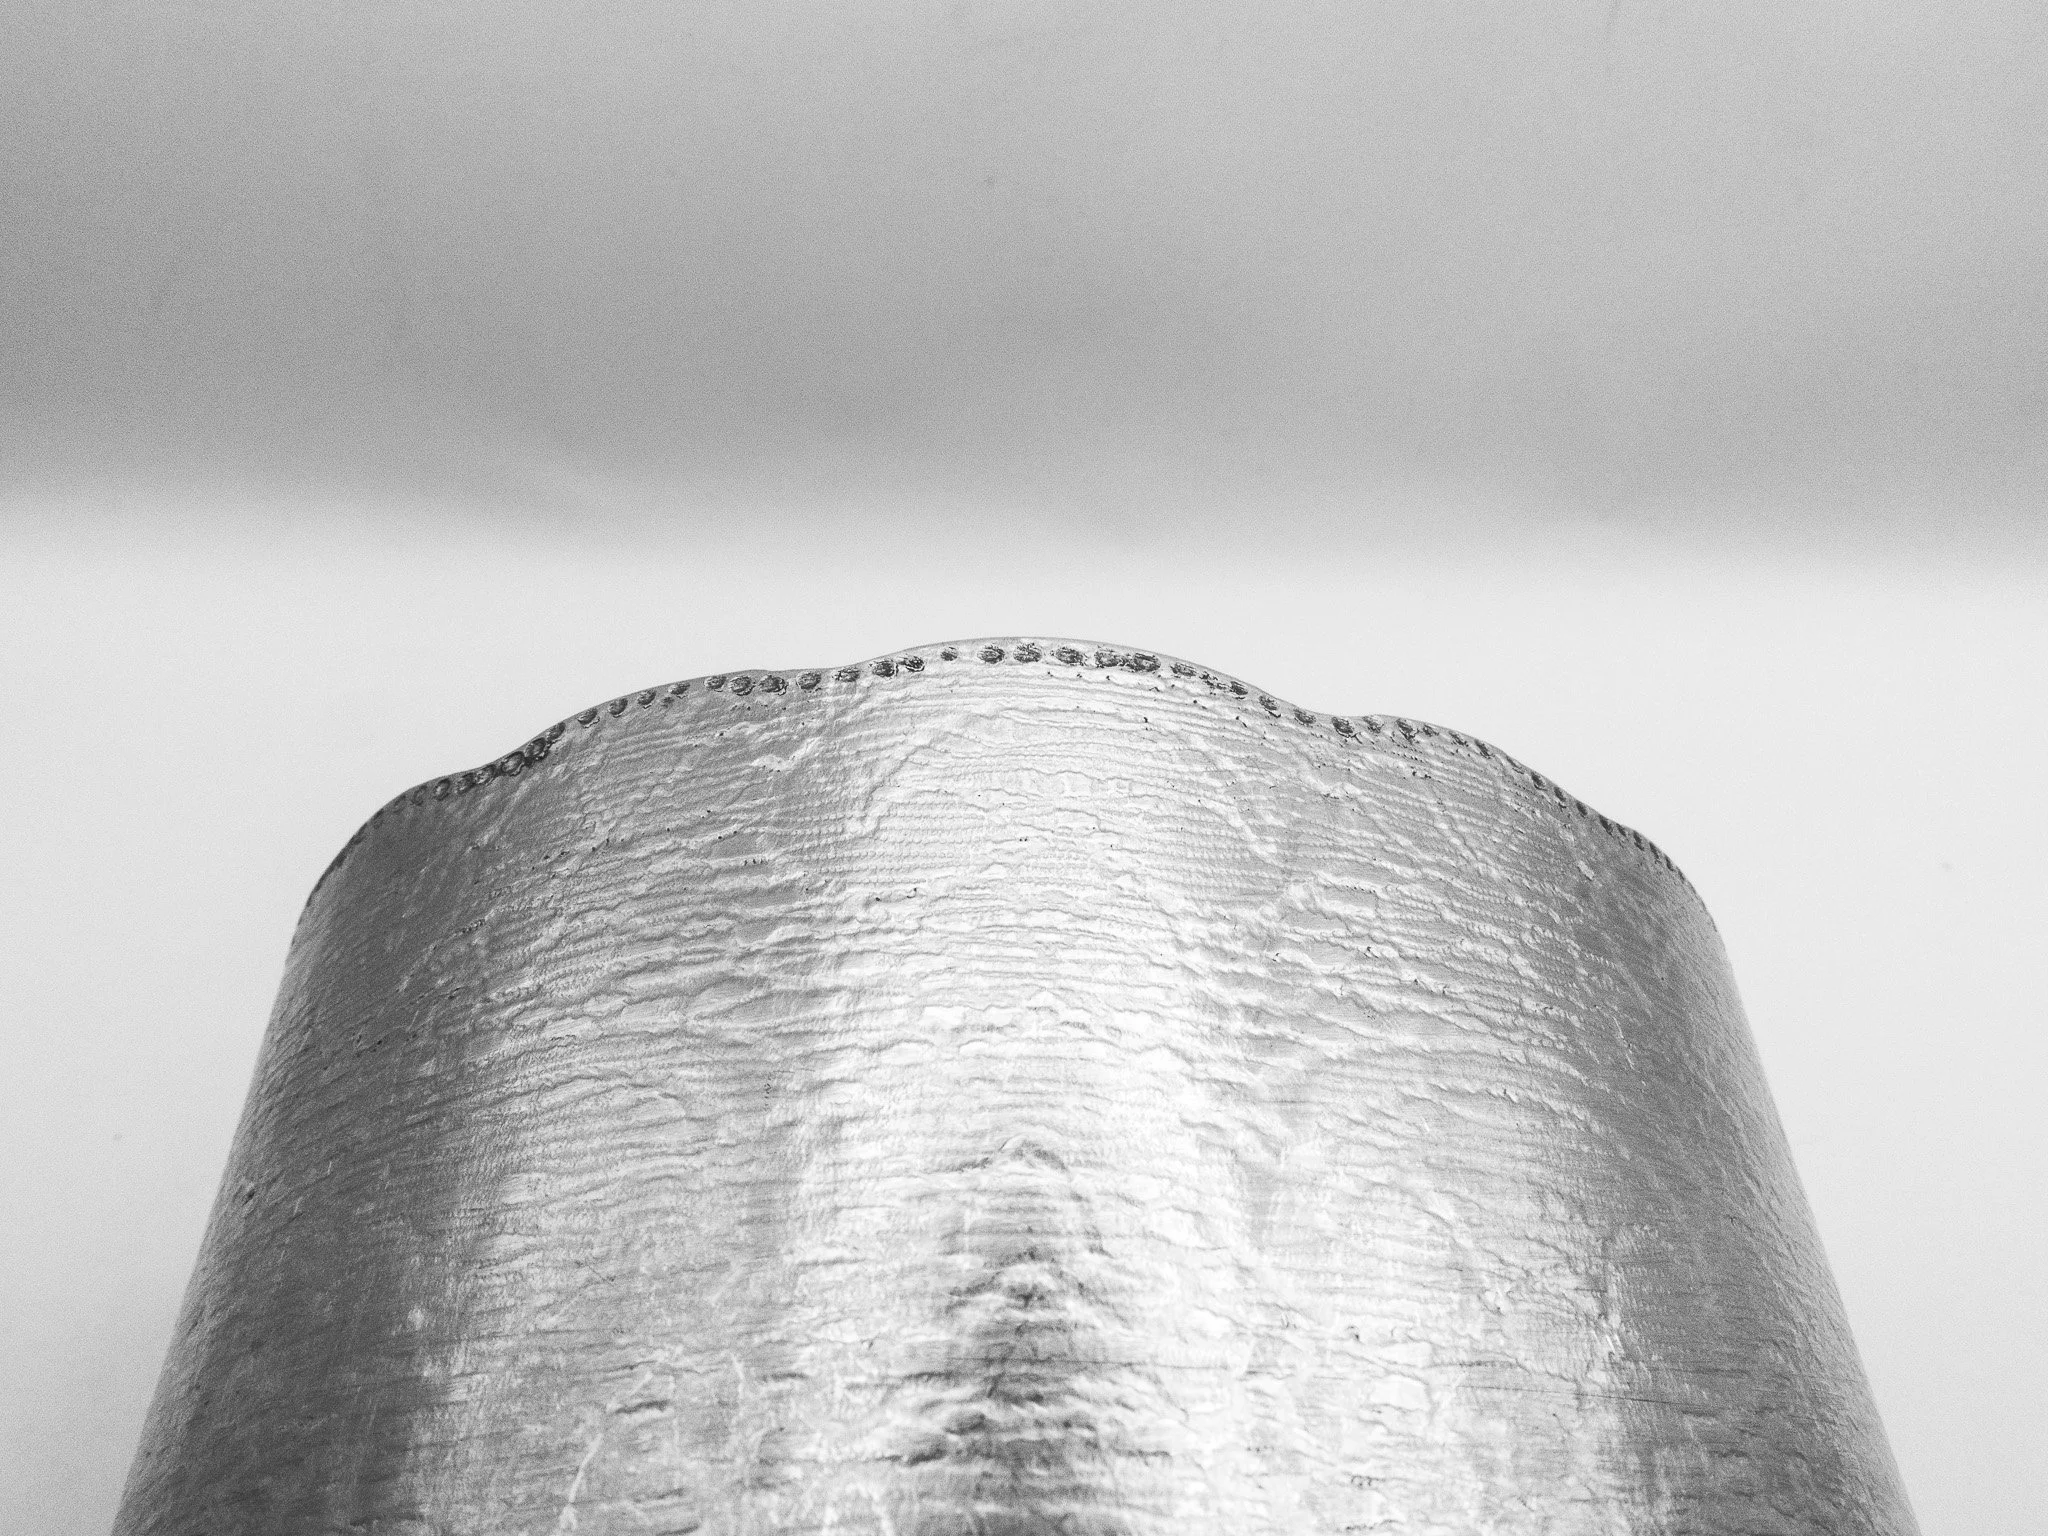
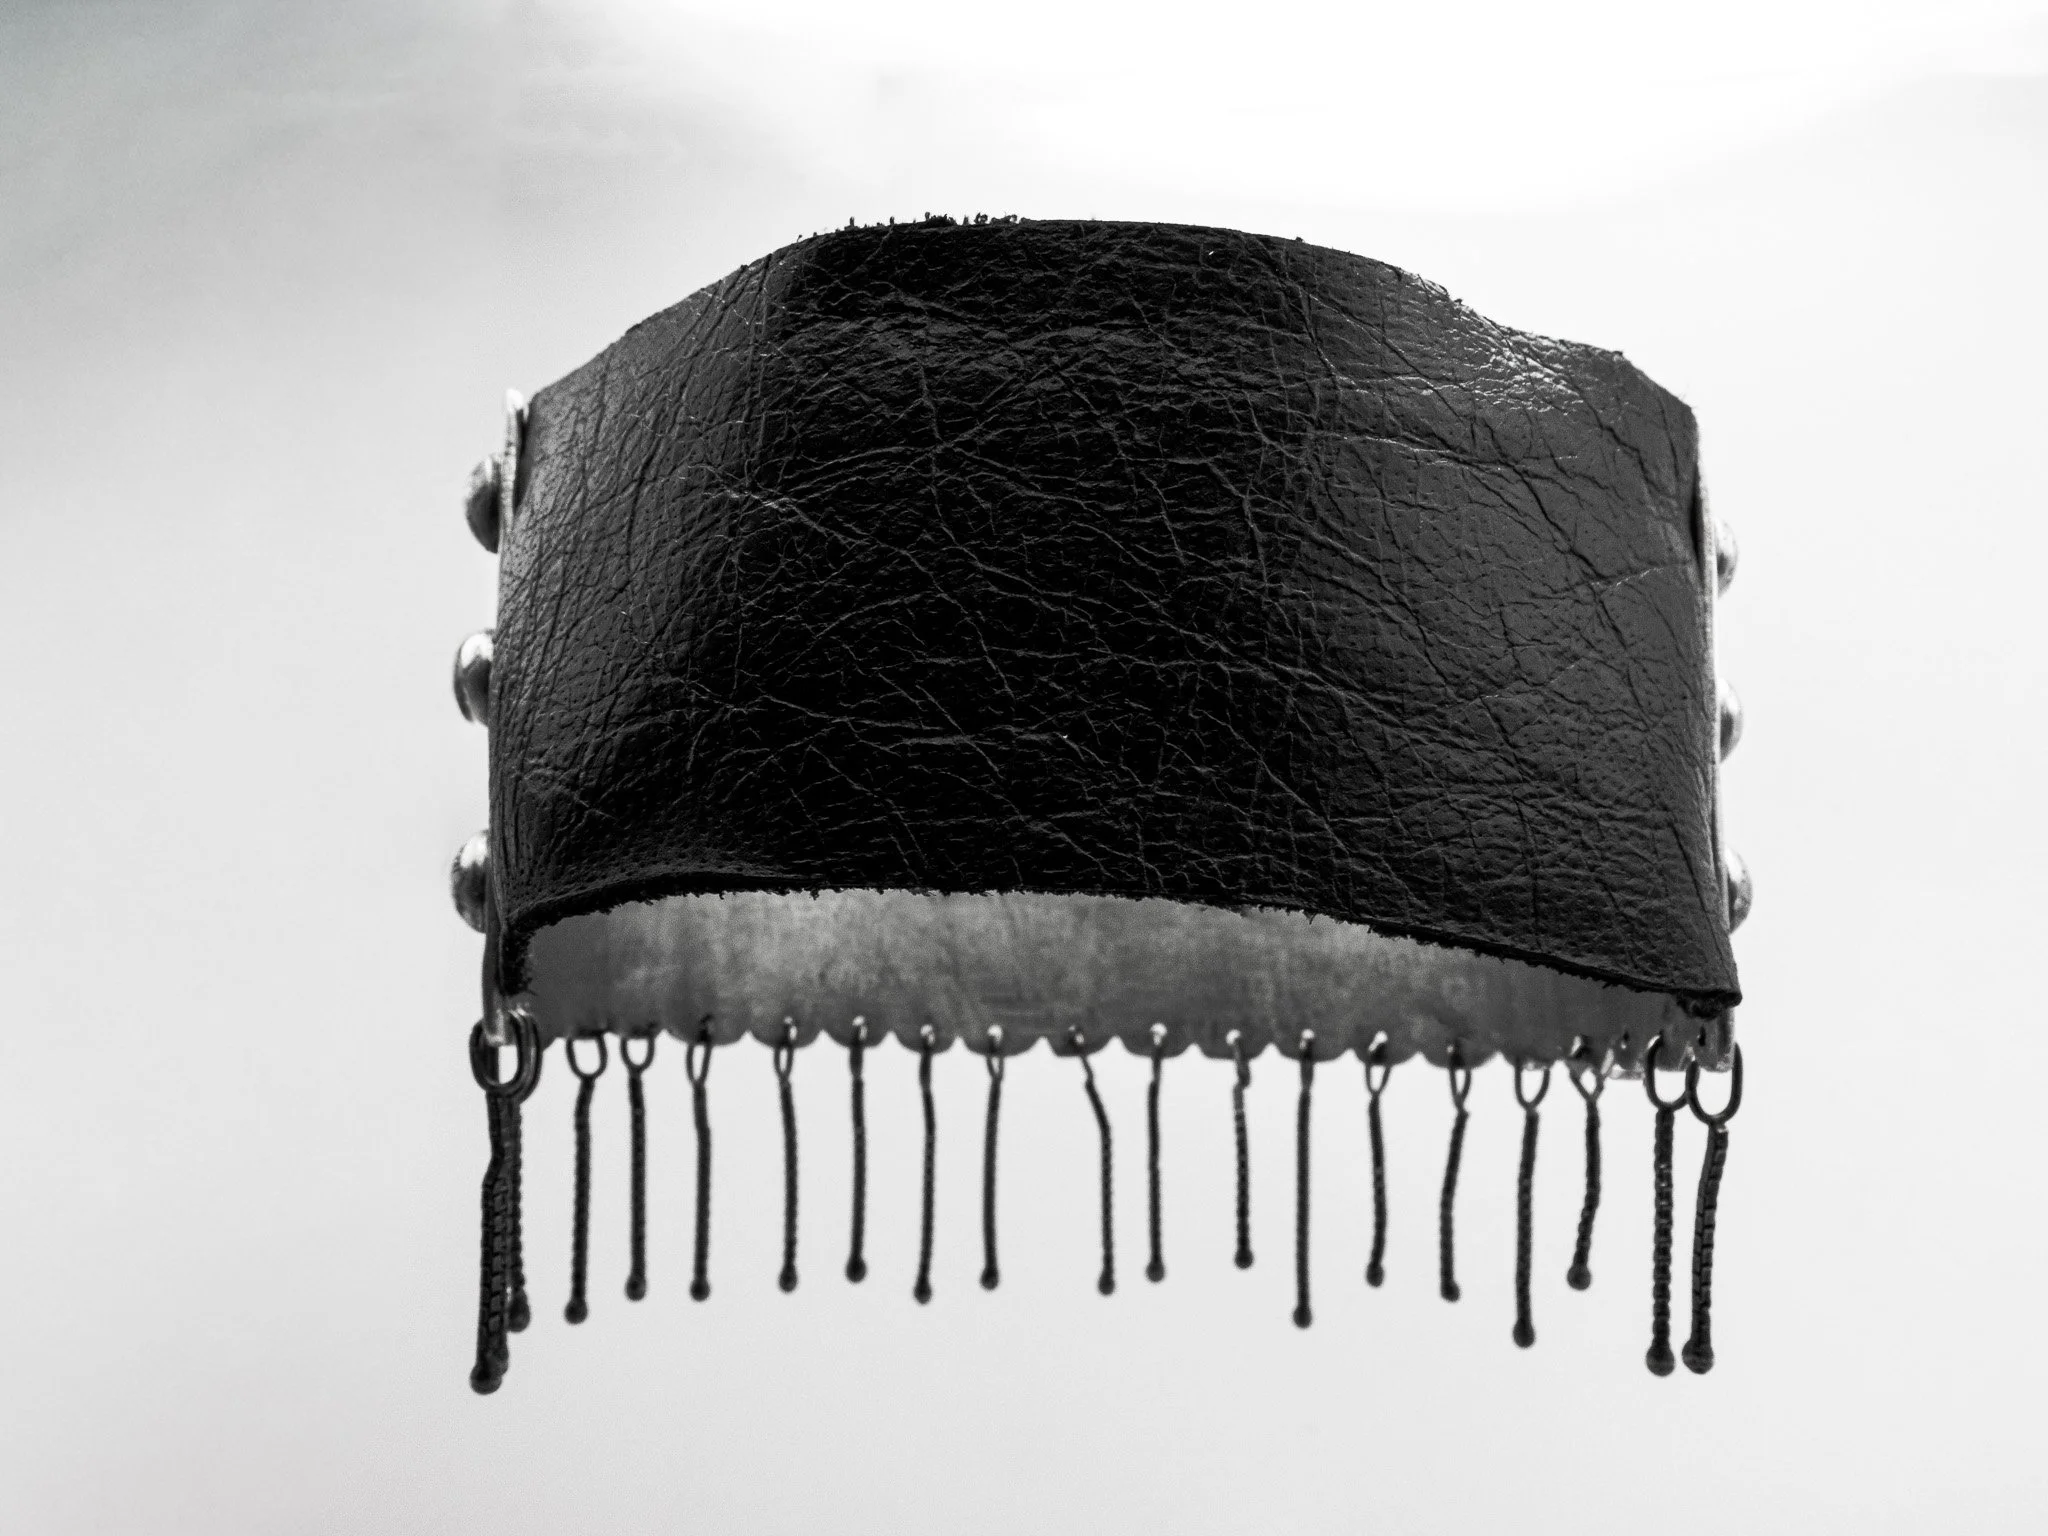
i chose To use the 1:St lace test as the imprint on the main body. Since i like the contrast of a See through, light and Flowy fabric shown on a shiny and rigid material.
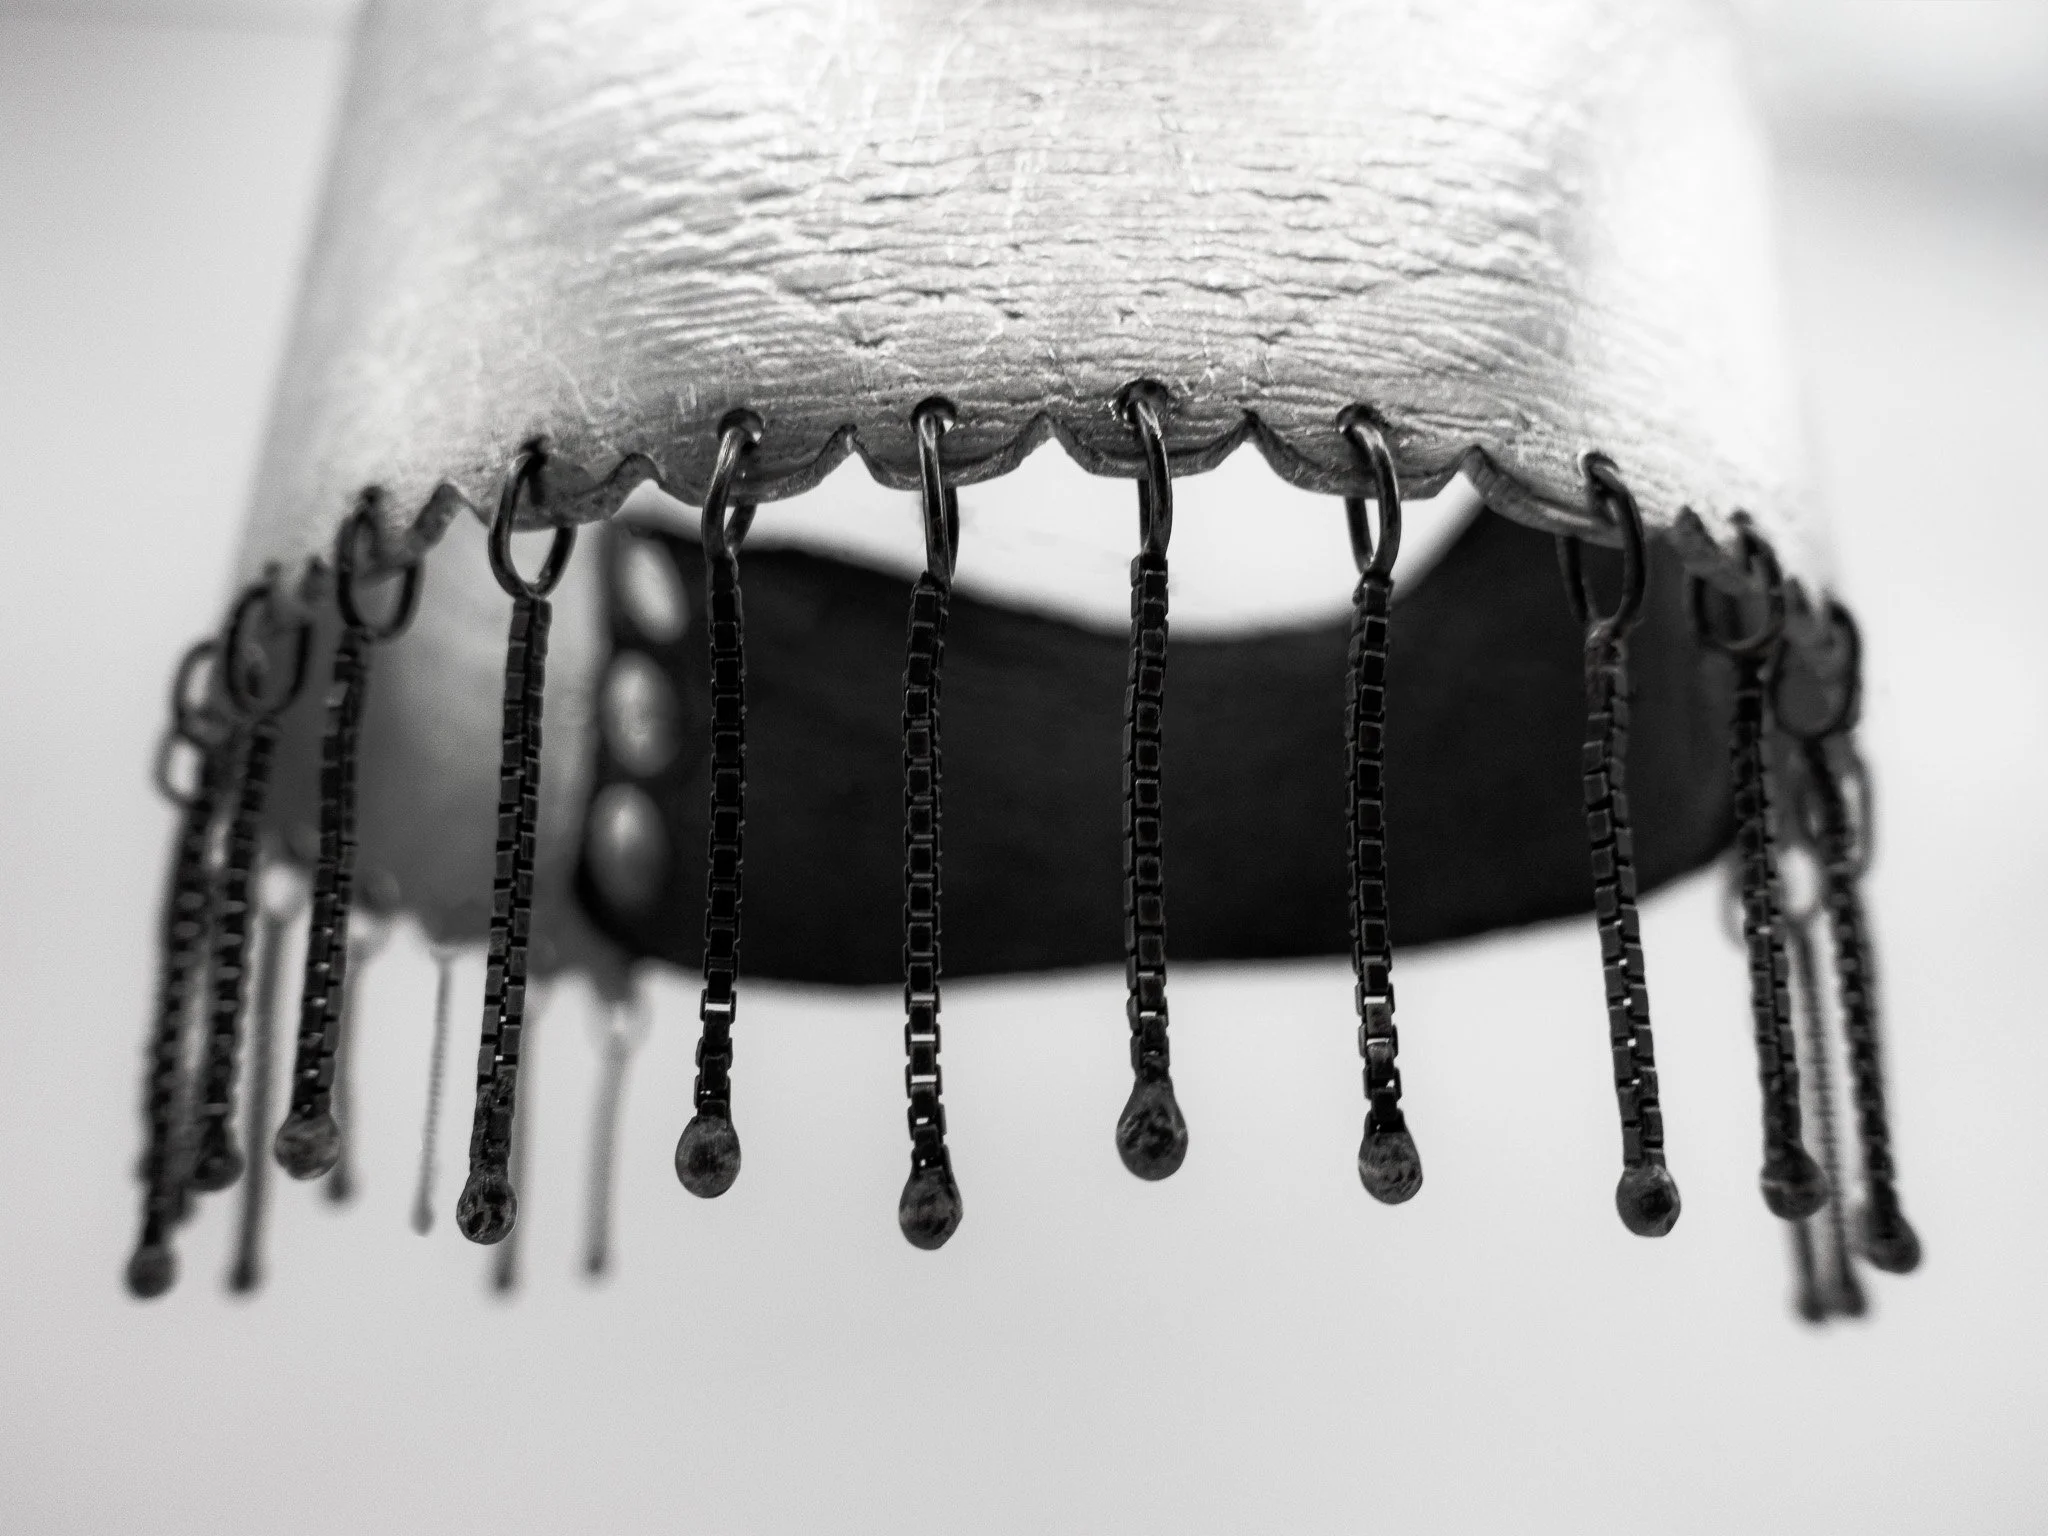
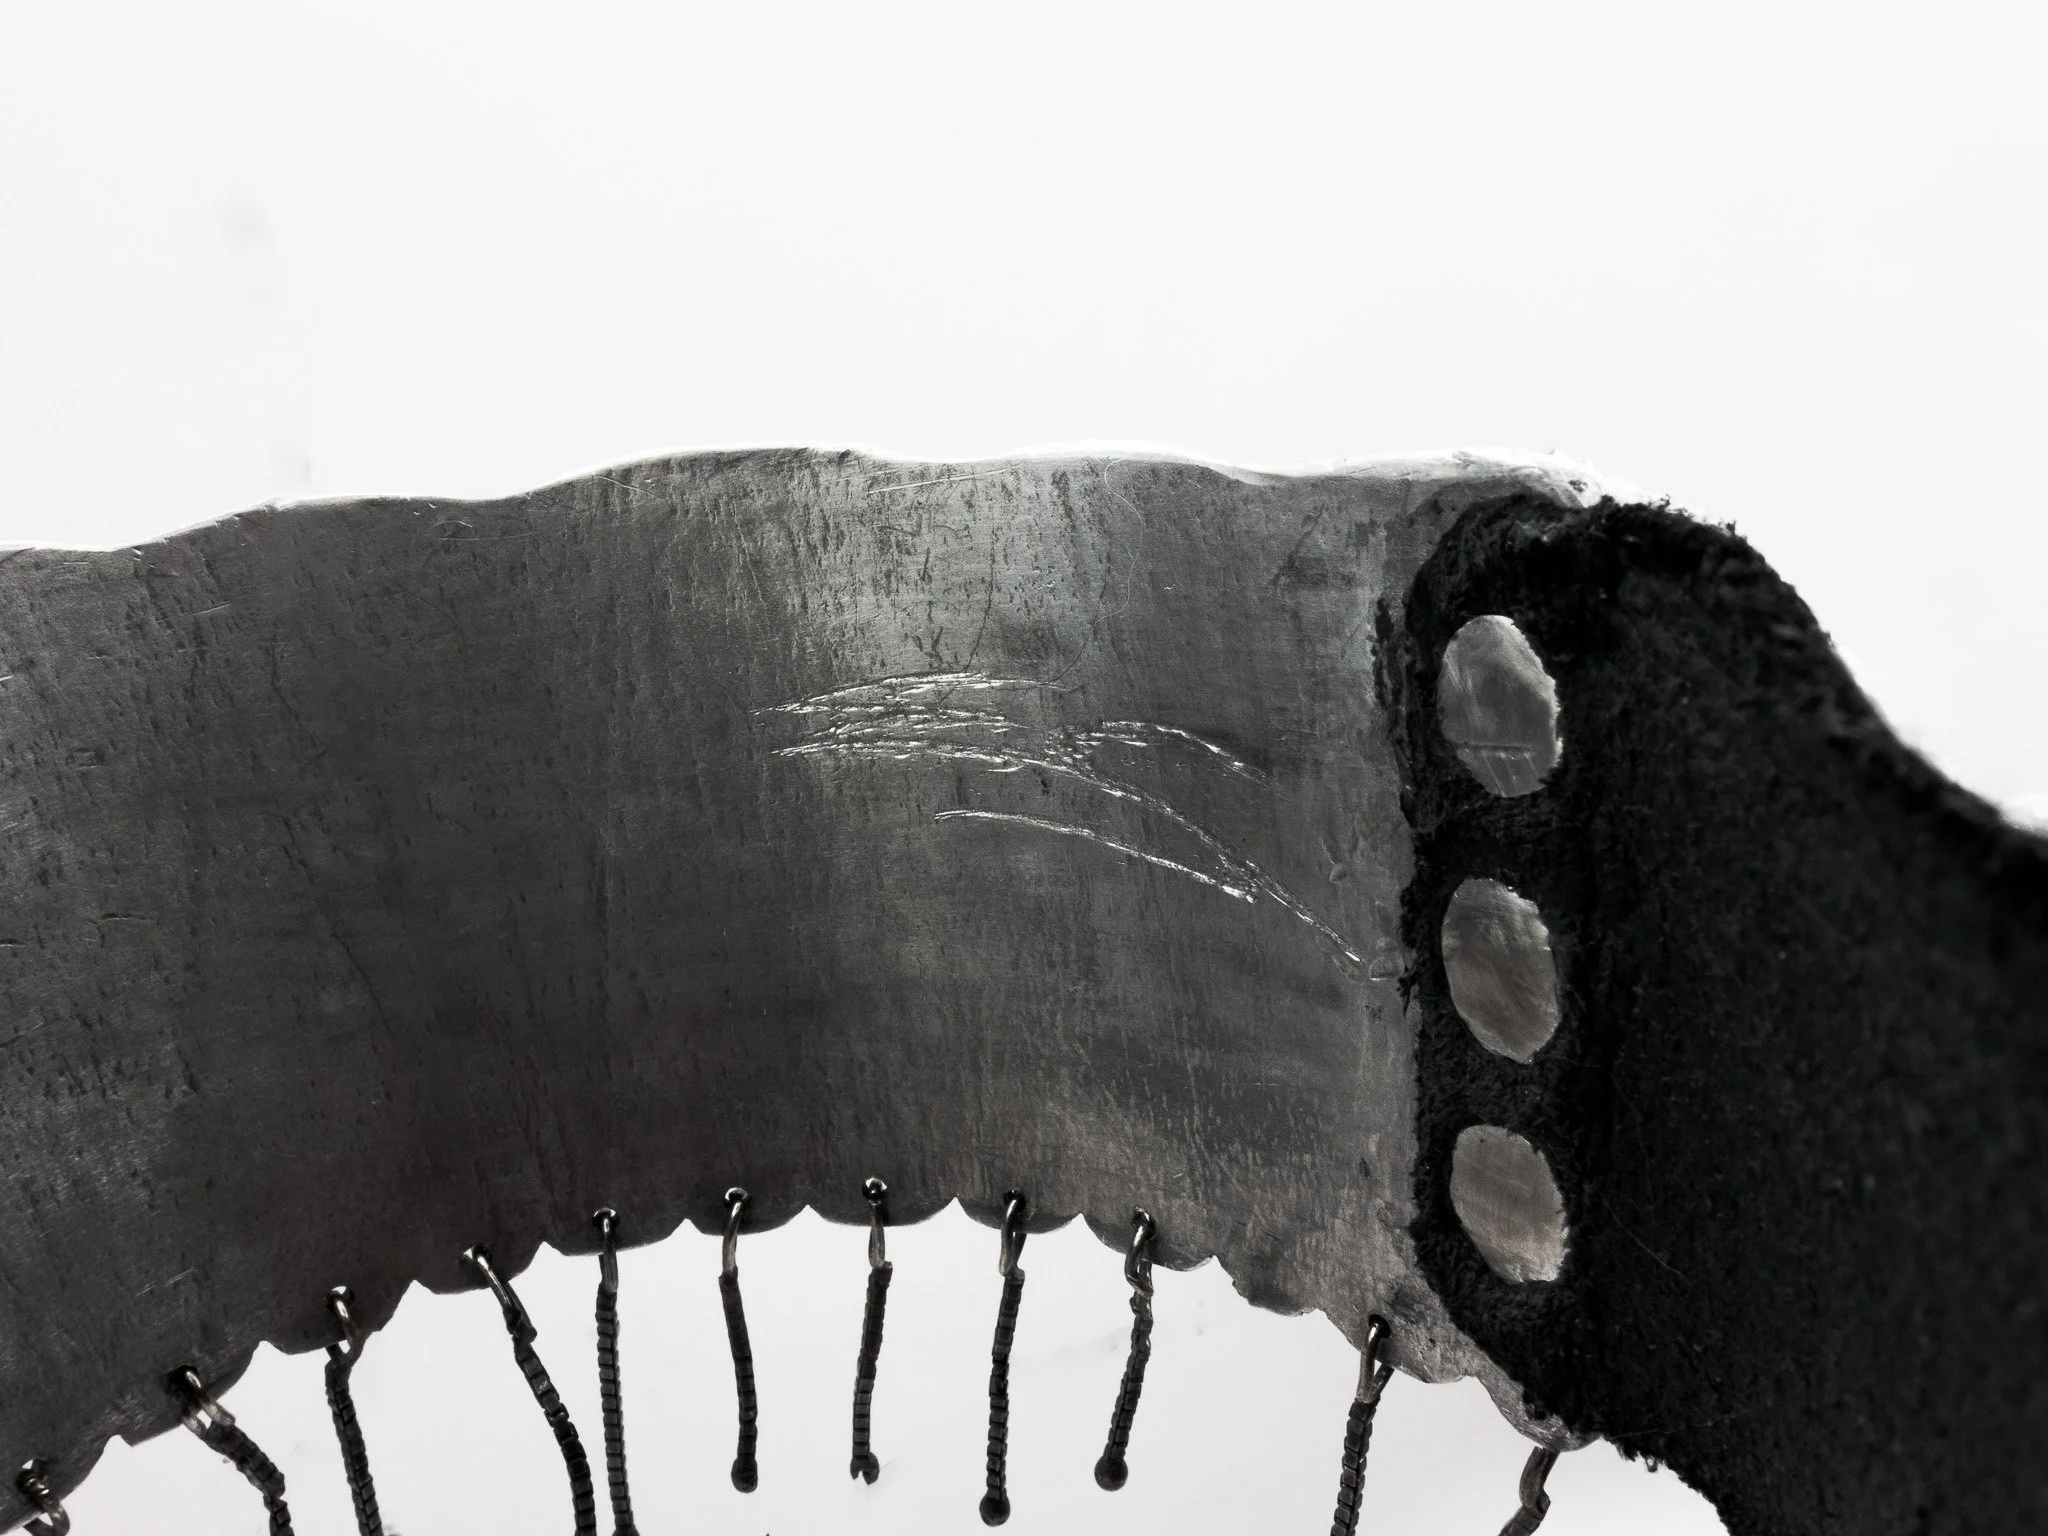
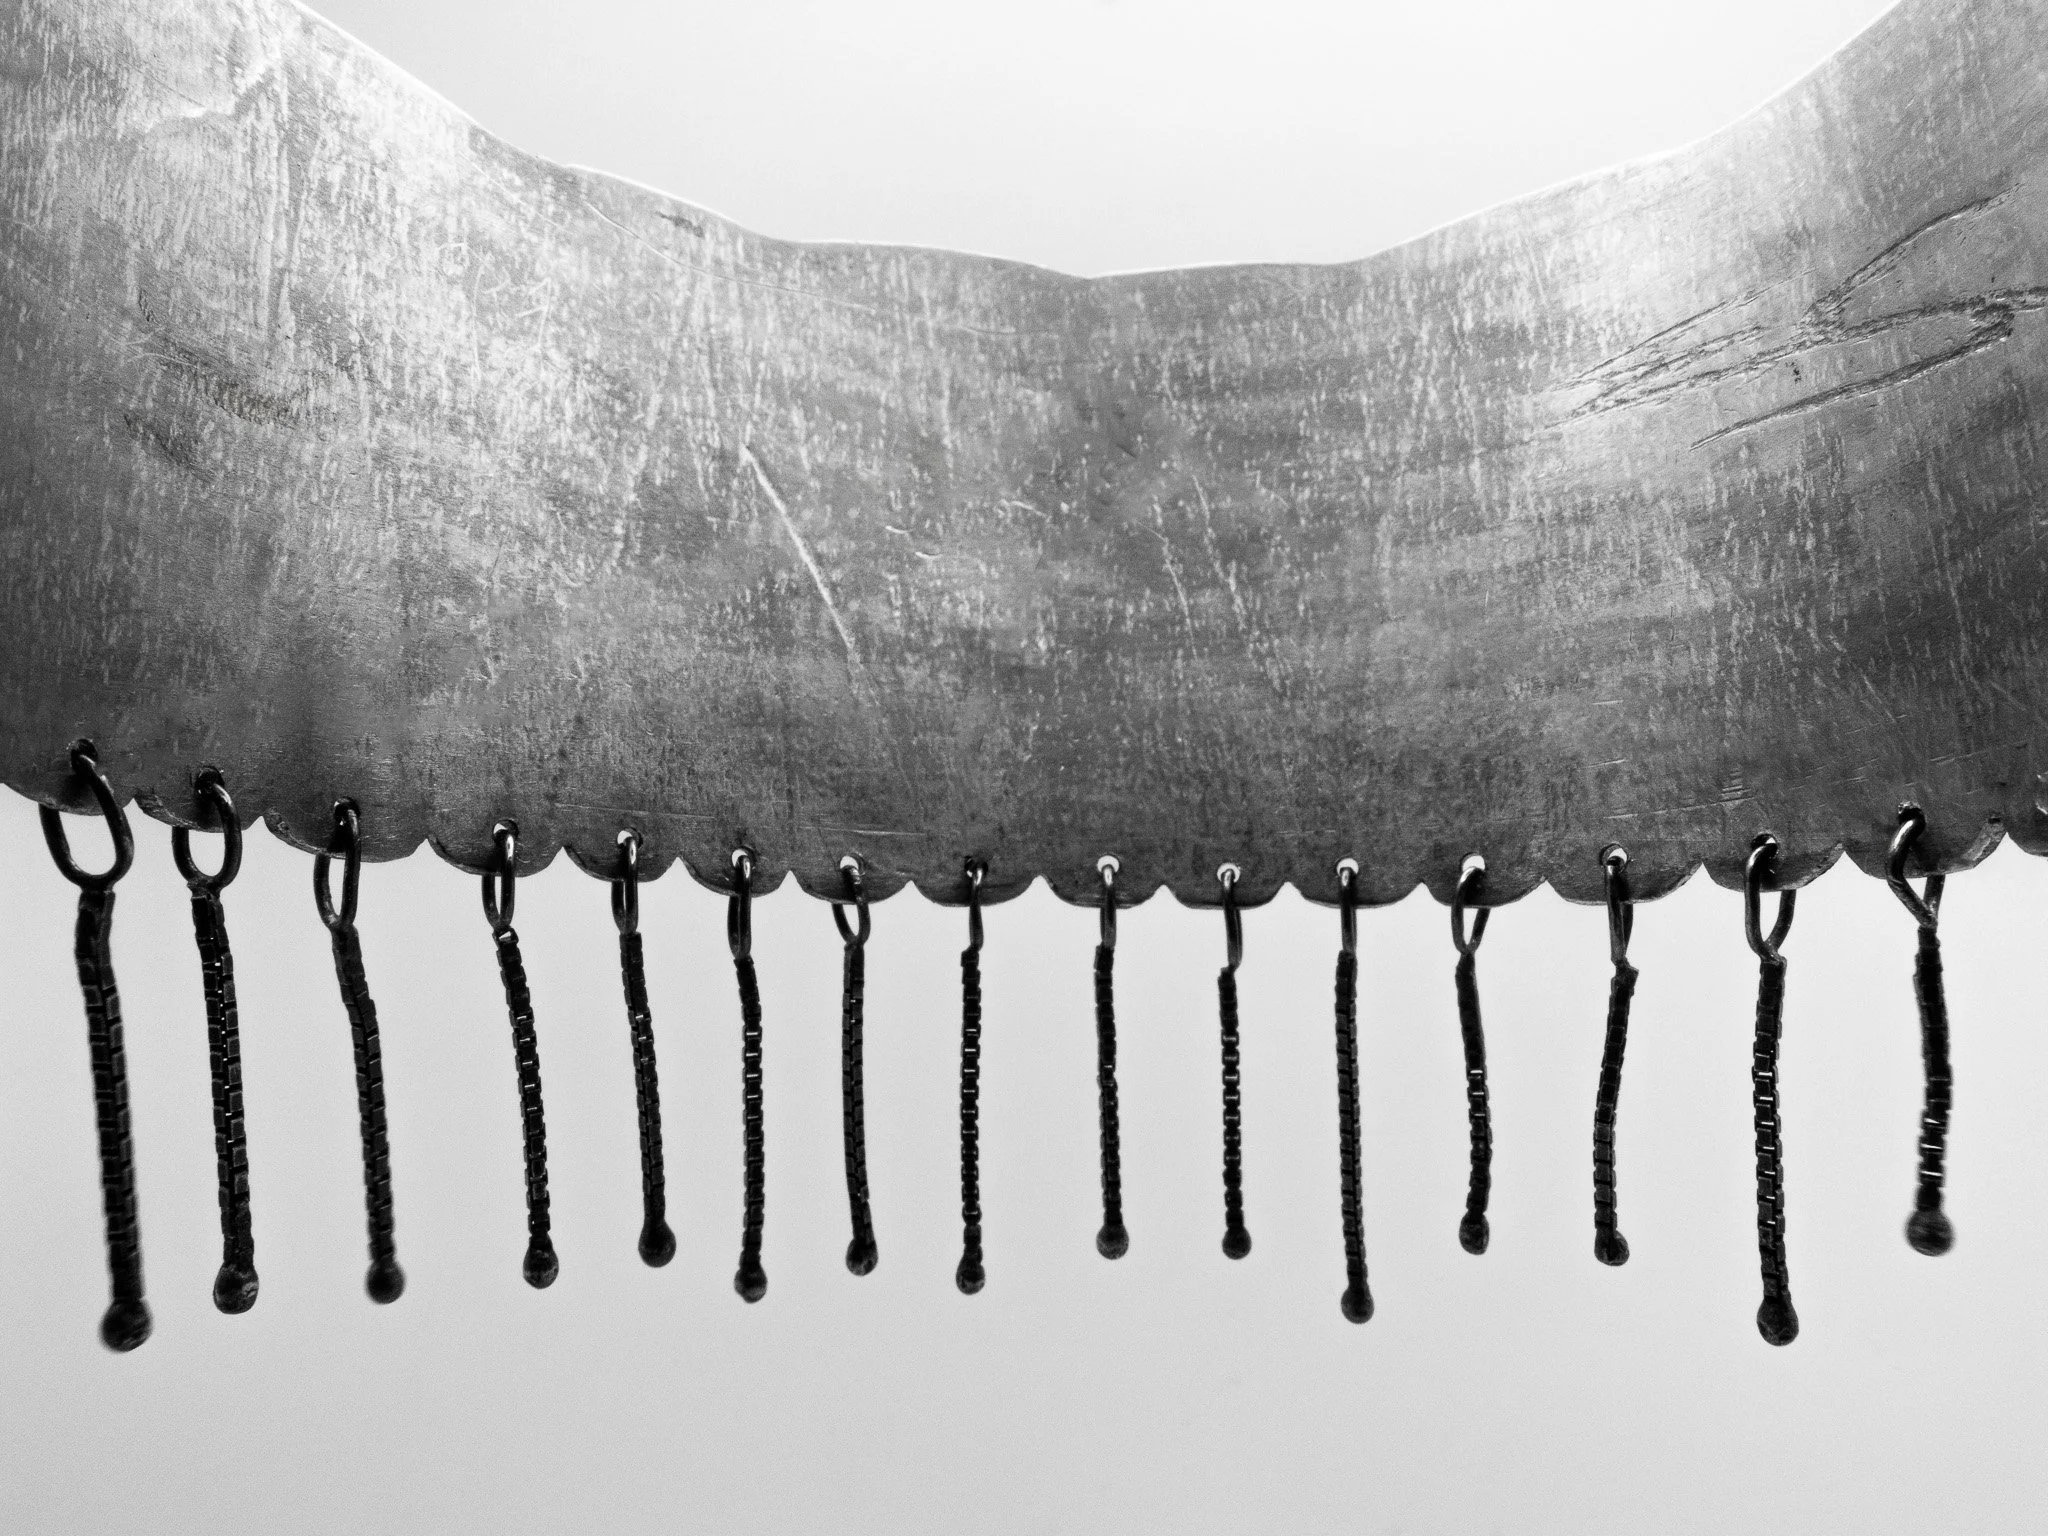
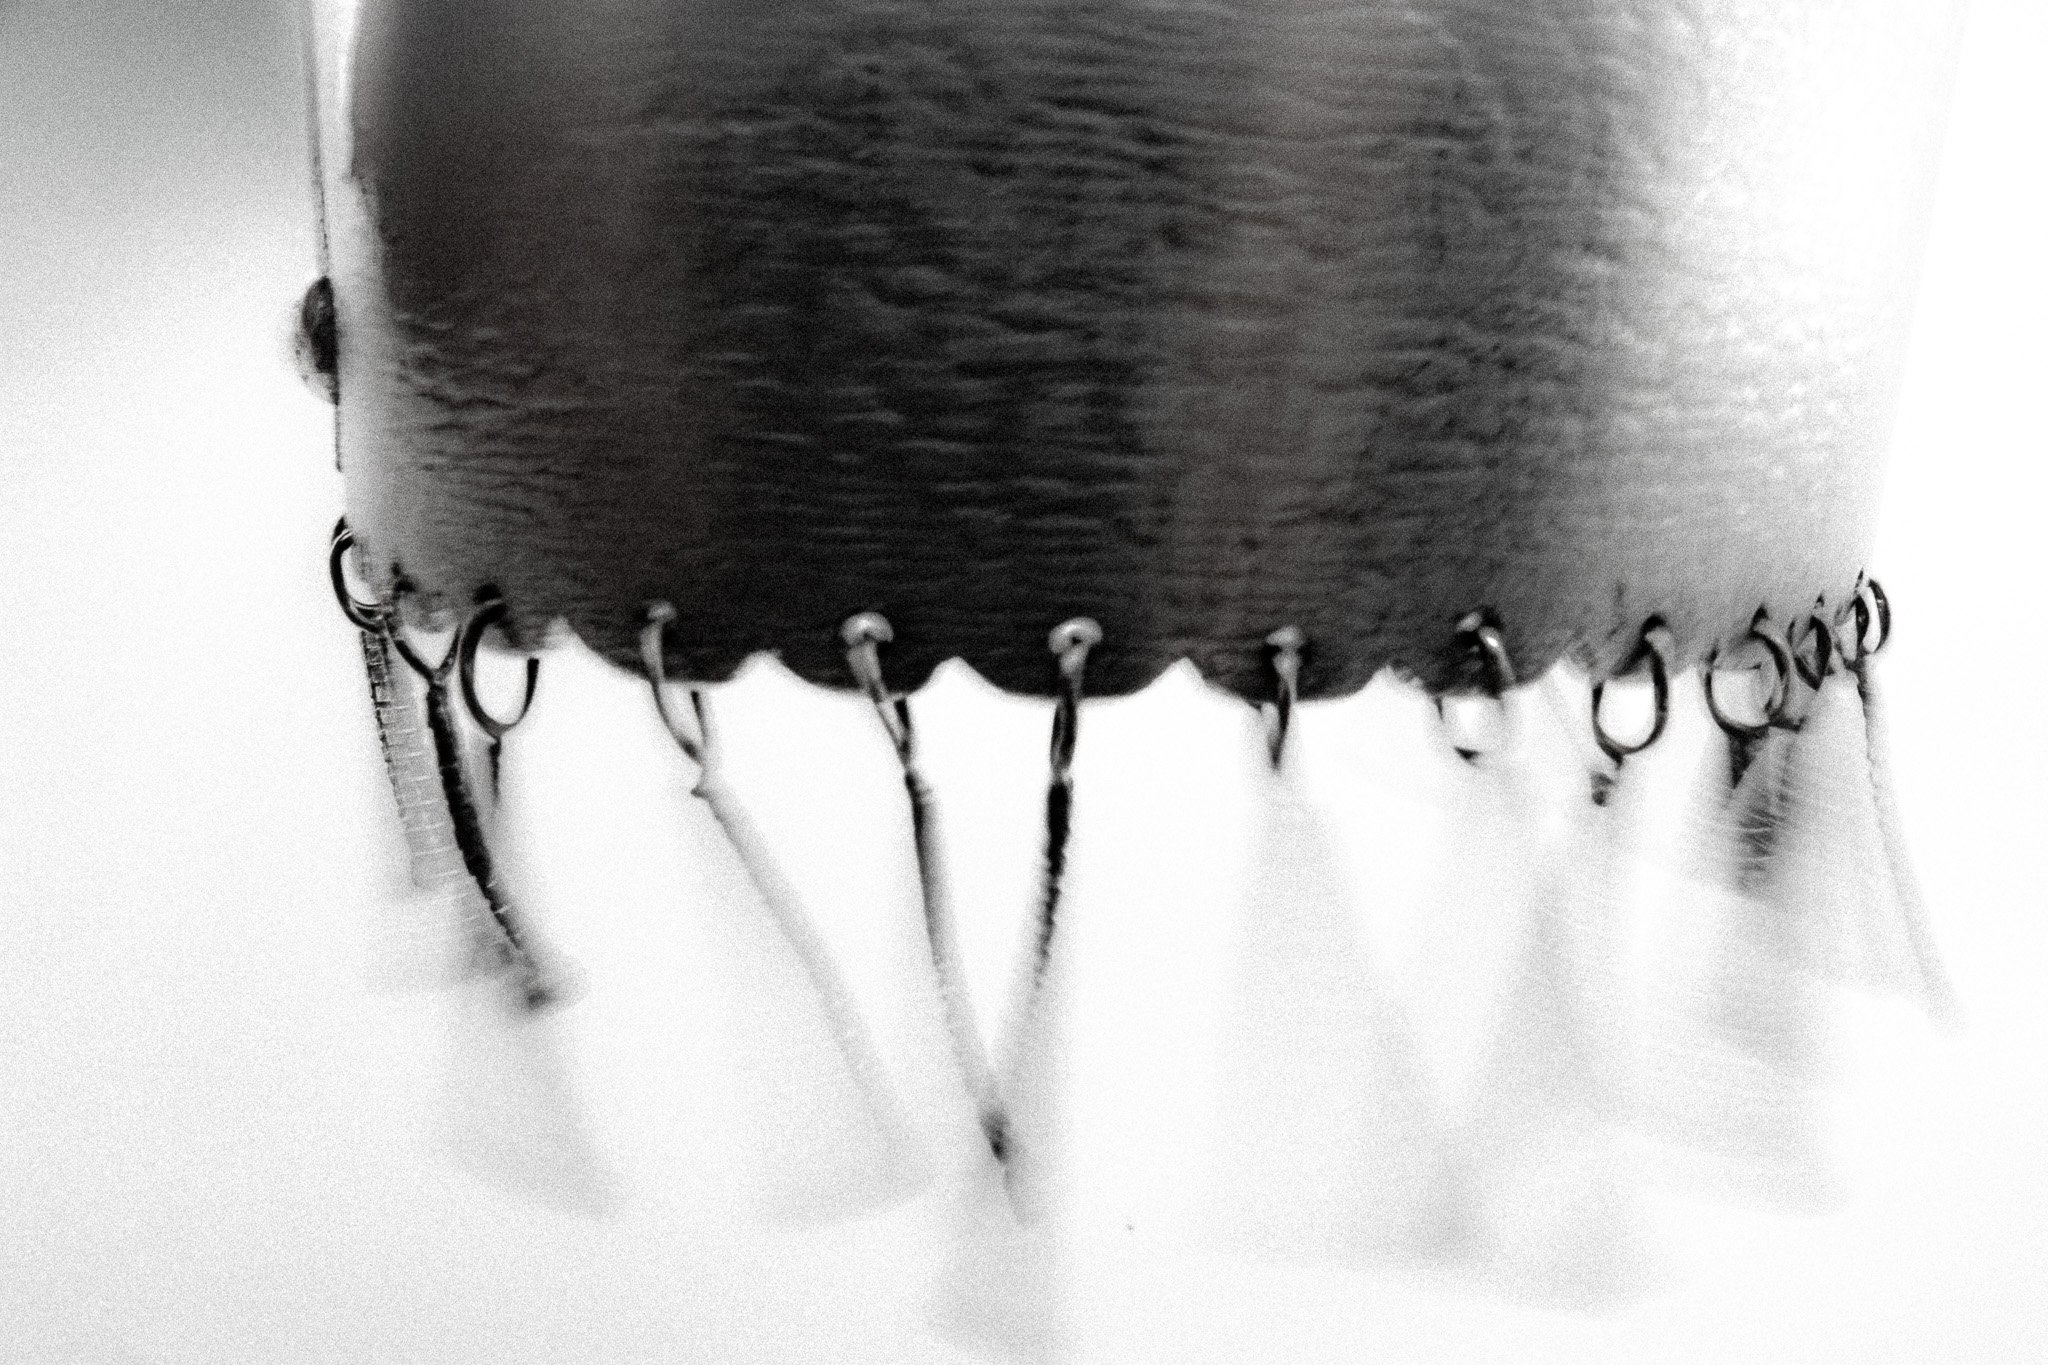
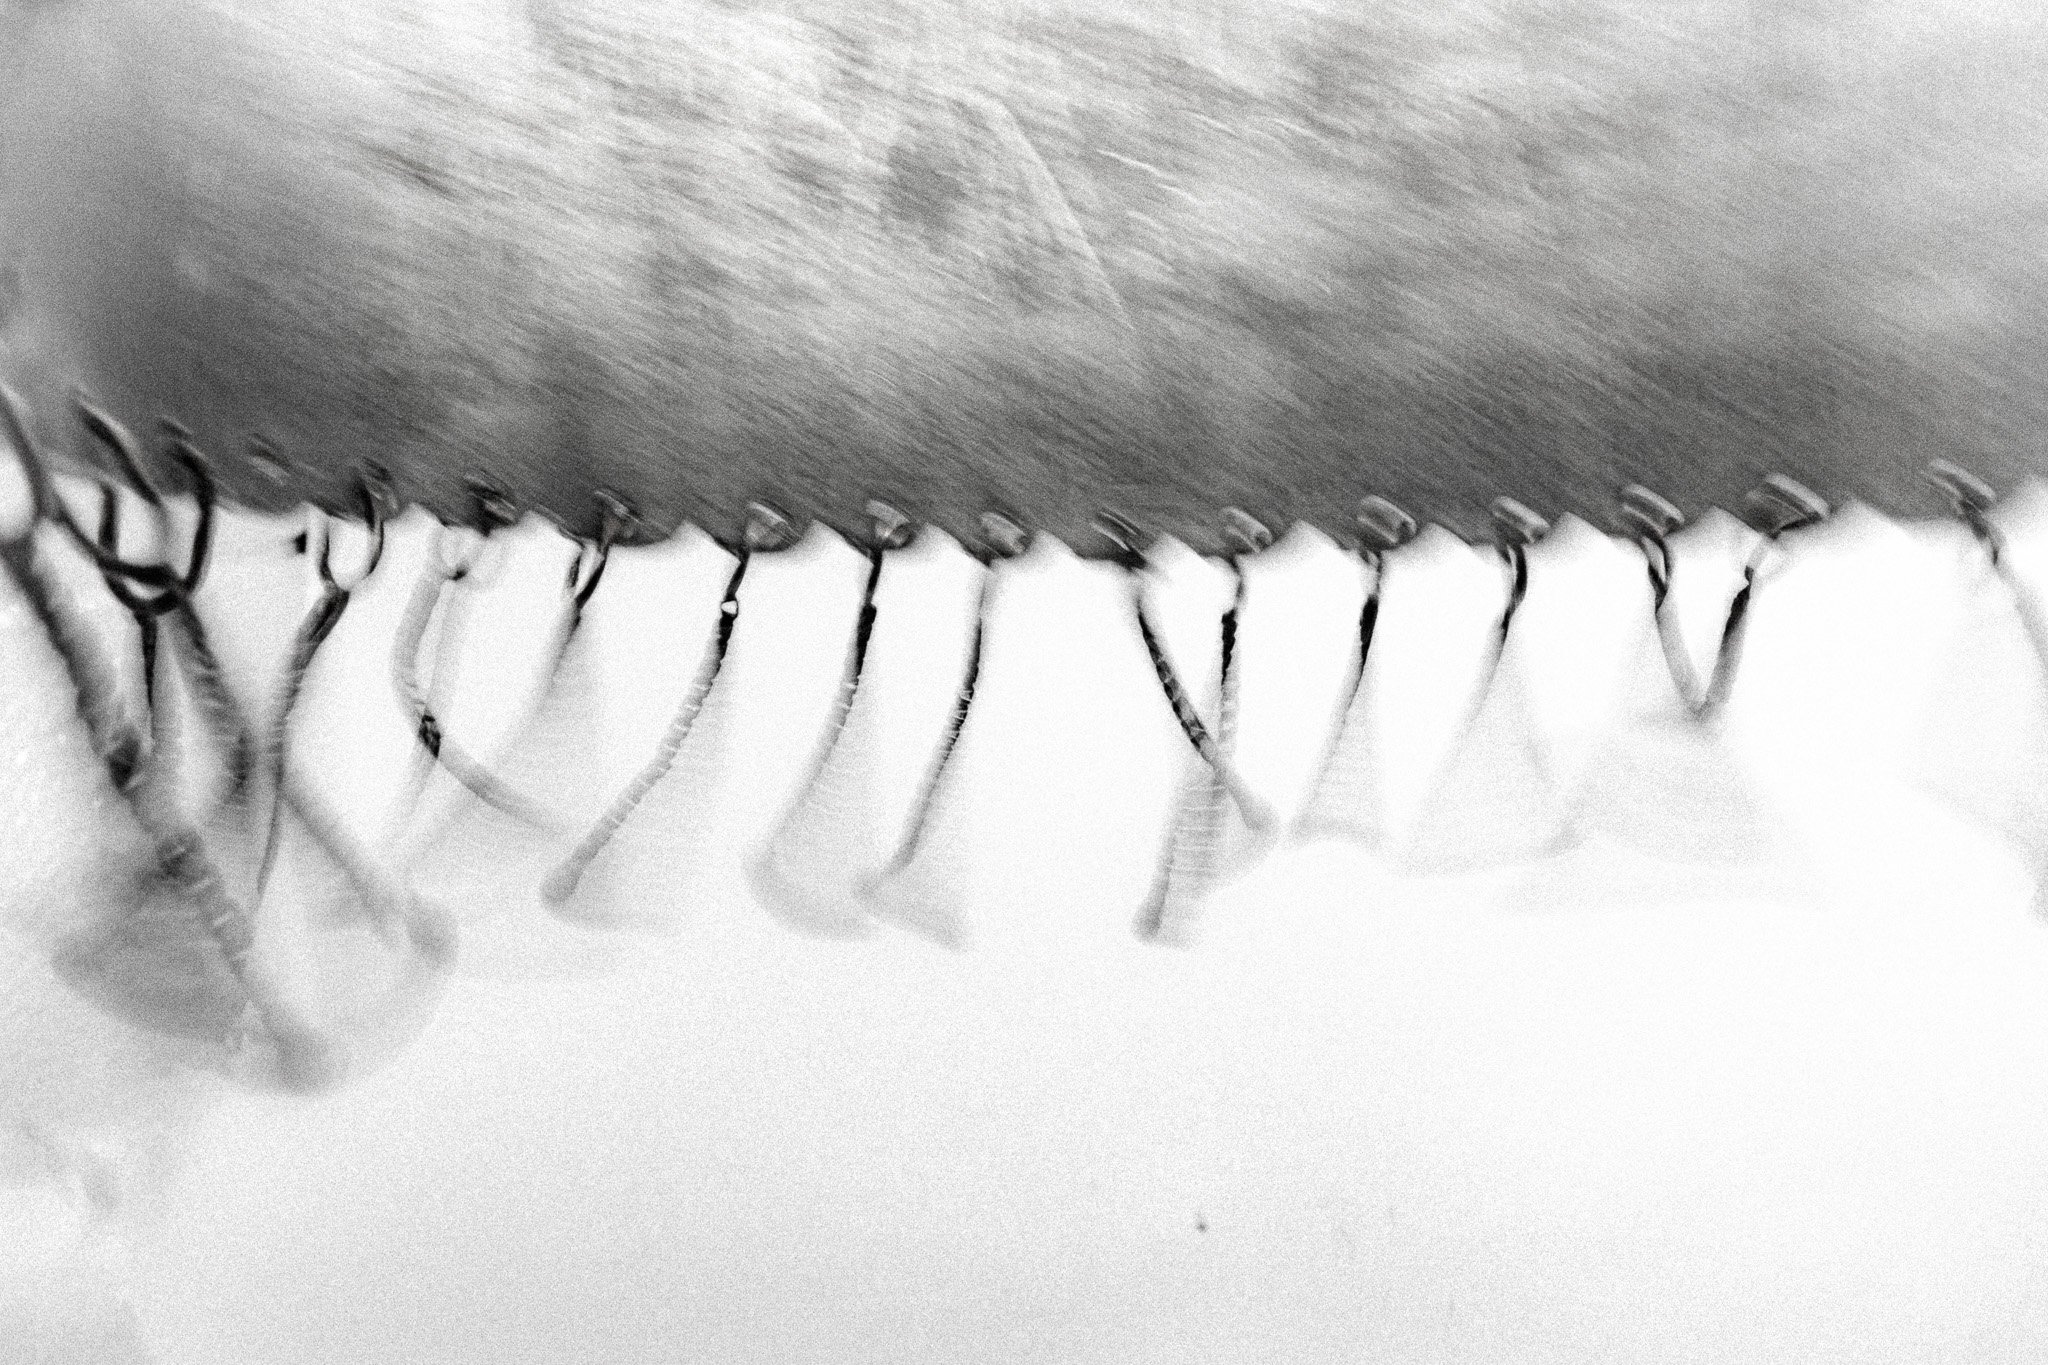
To make the shape pop more i sawed small arches at the bottom, also engraved the top arch with round indents to Deepen the already imprinted Details.
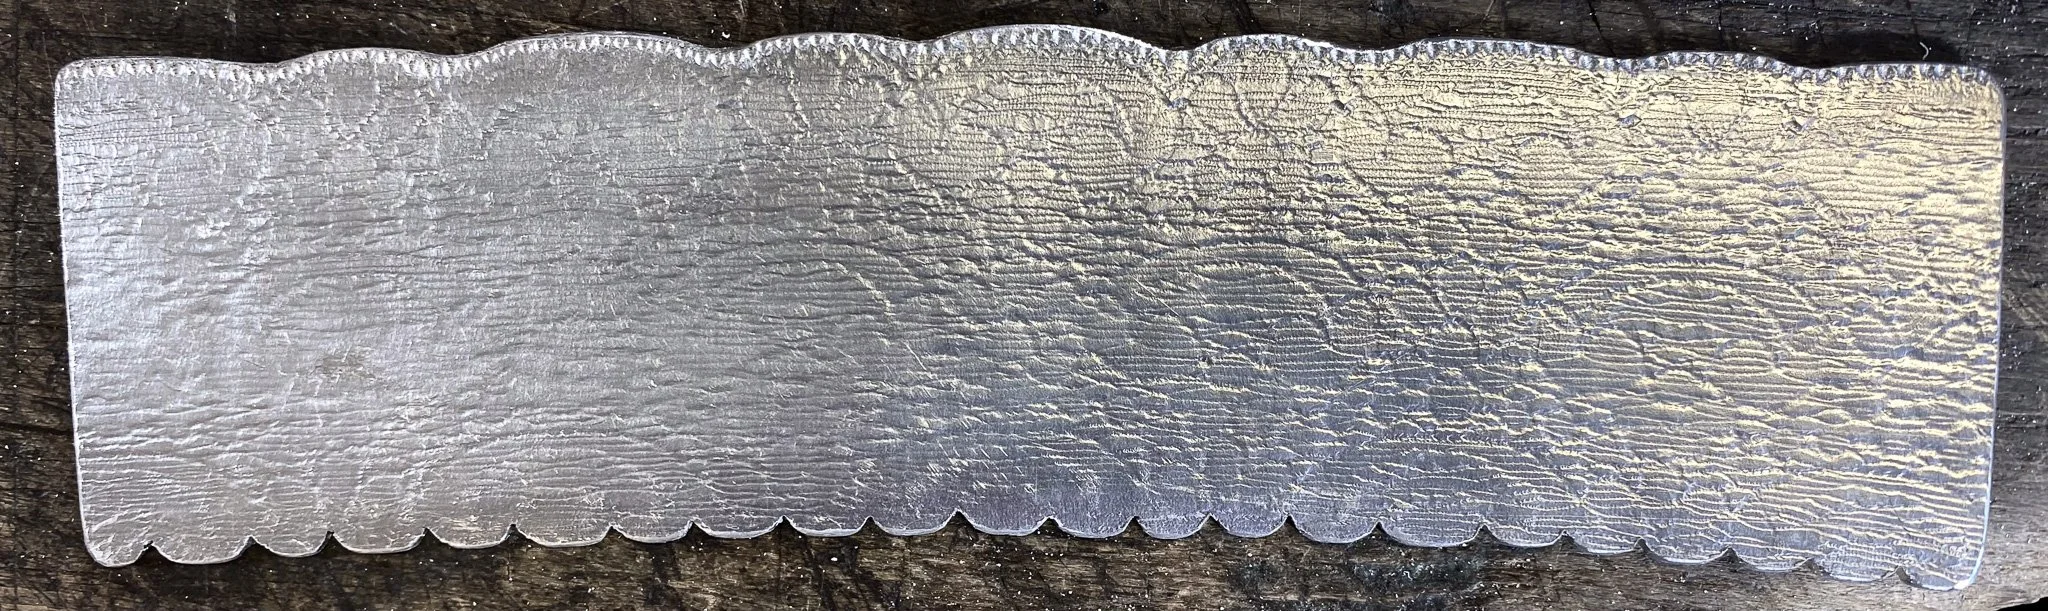
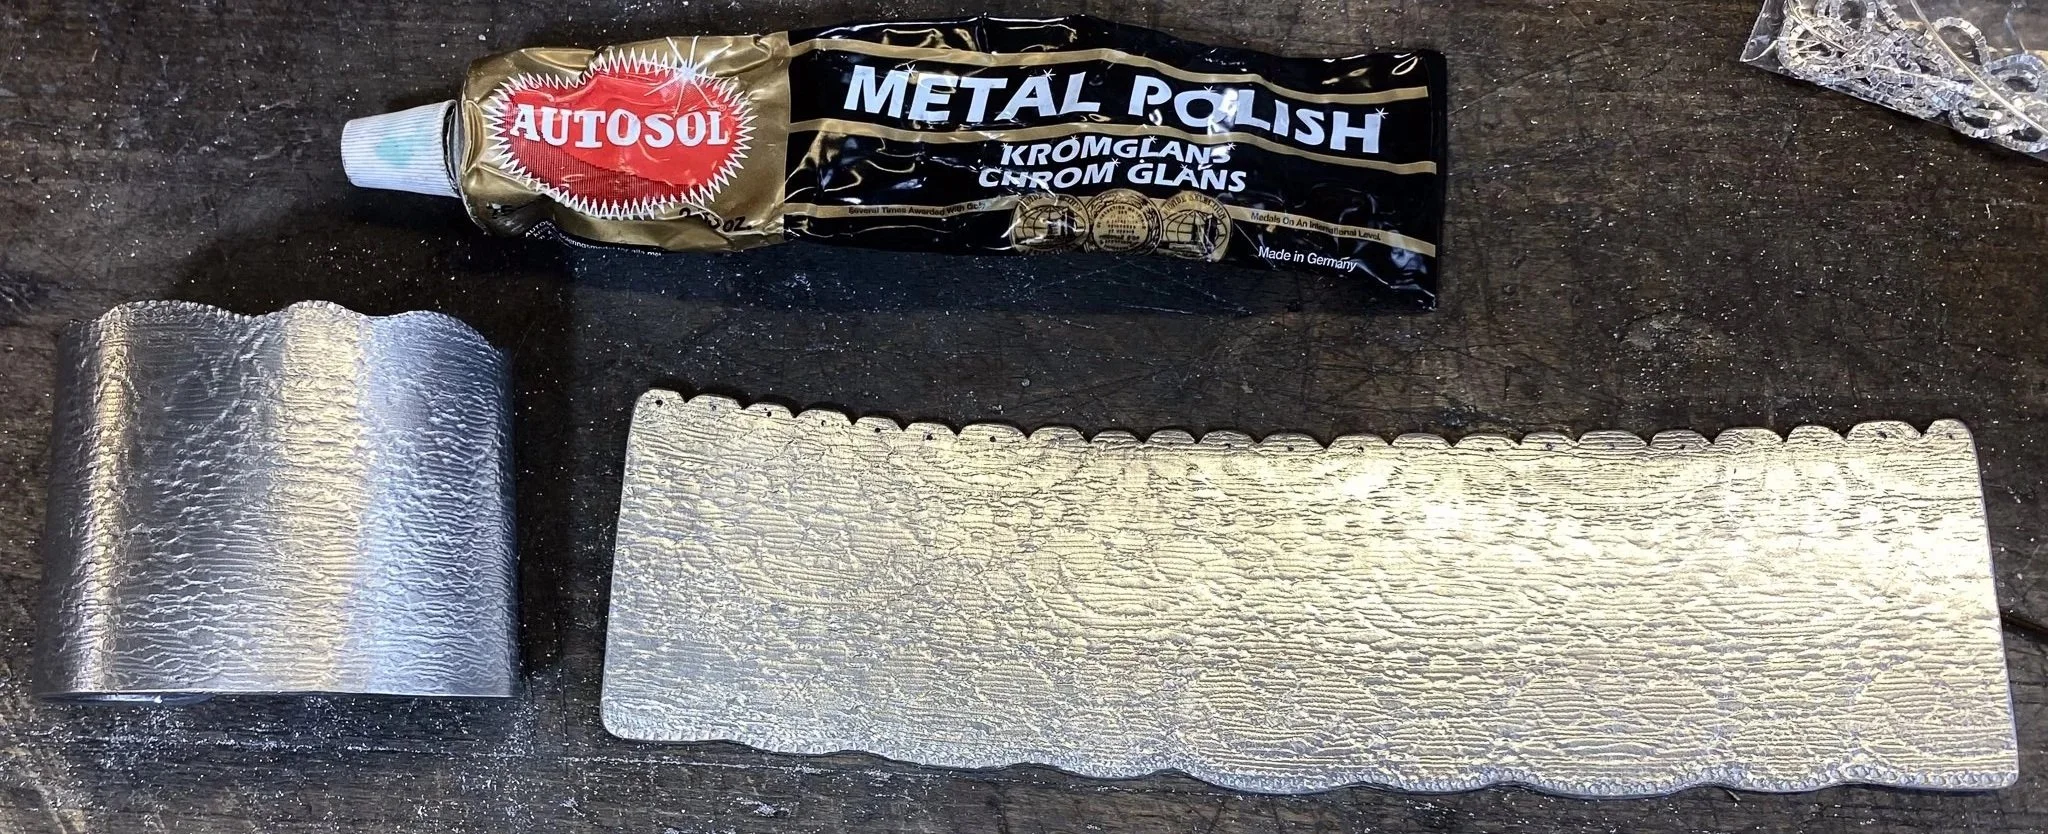
Having drilled holes at the bottom for the fringes. I then tested a chrome metal polish on a test piece of Aluminium seeing if i could get a darker Finish than the normal shade of Aluminium. Liking the test i decided to add the polish when the cuff was Finished.
I bended the strip to work on the fit and how much leather i would need for the back strap
Measuring the leather i Would need, i cut a slightly curved rectangle of a thinner black horse leather
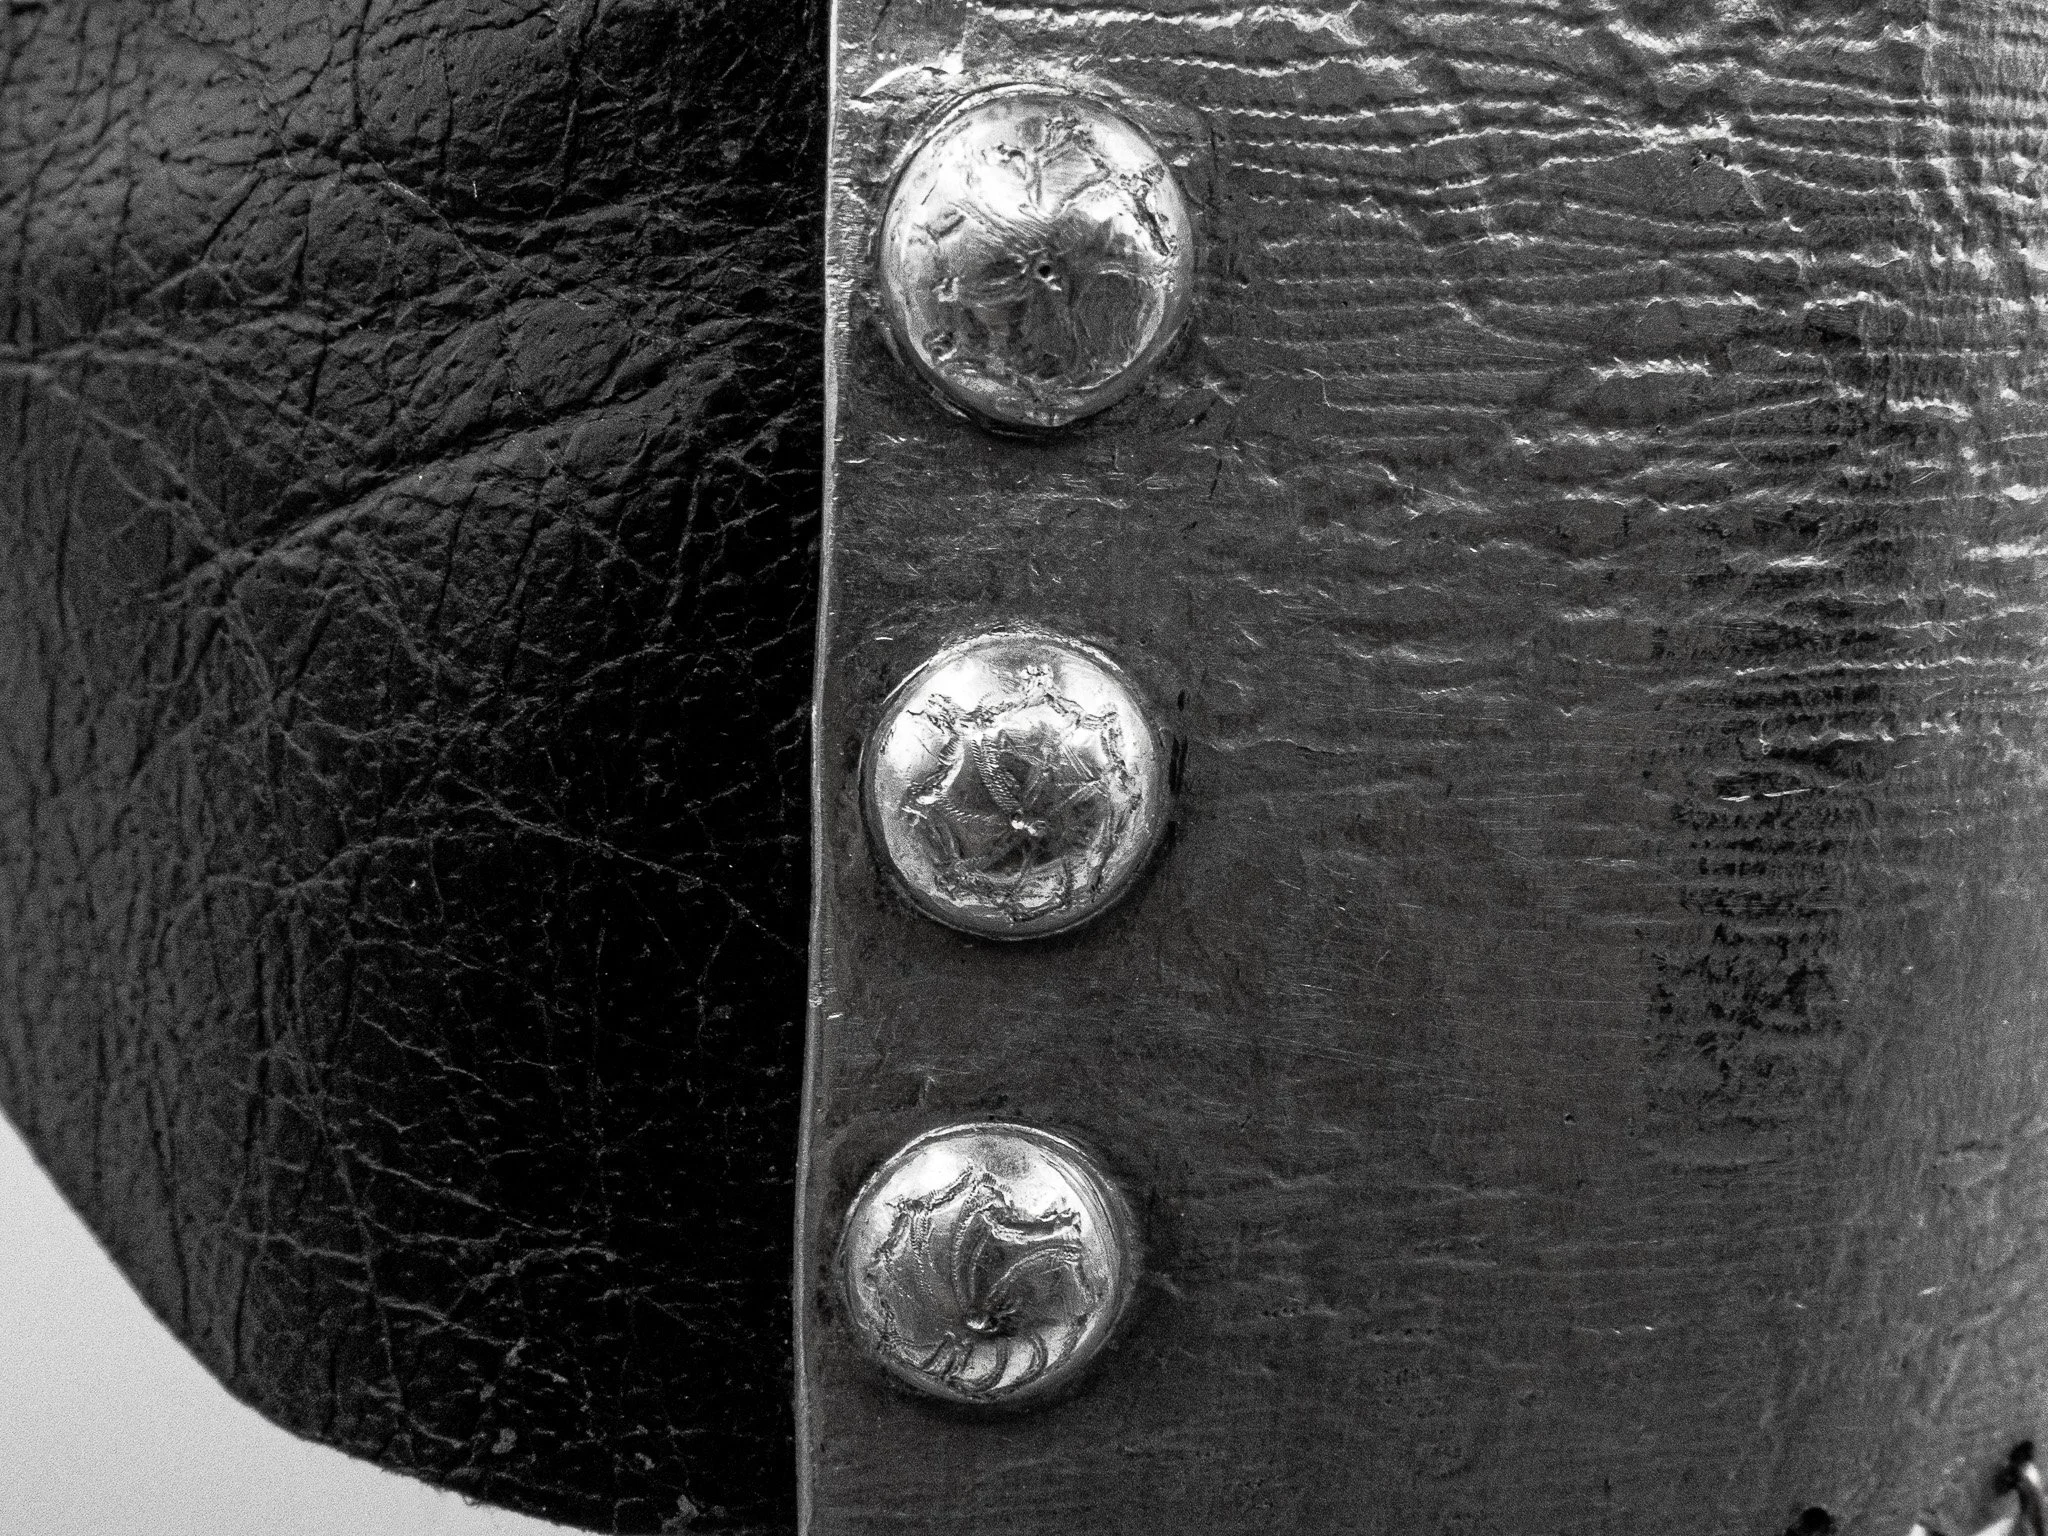
After drilling three holes per side on the main body, i hammered rivets securing the leather back to the main body
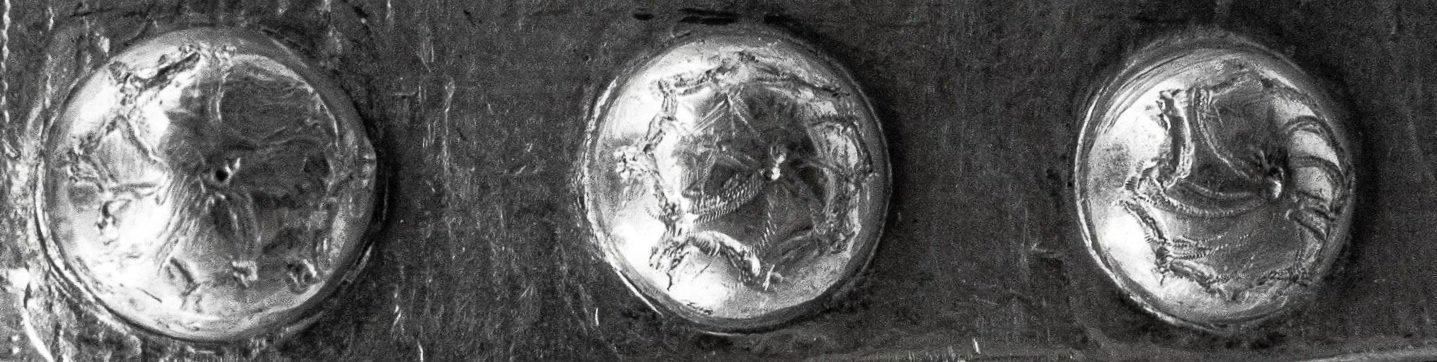
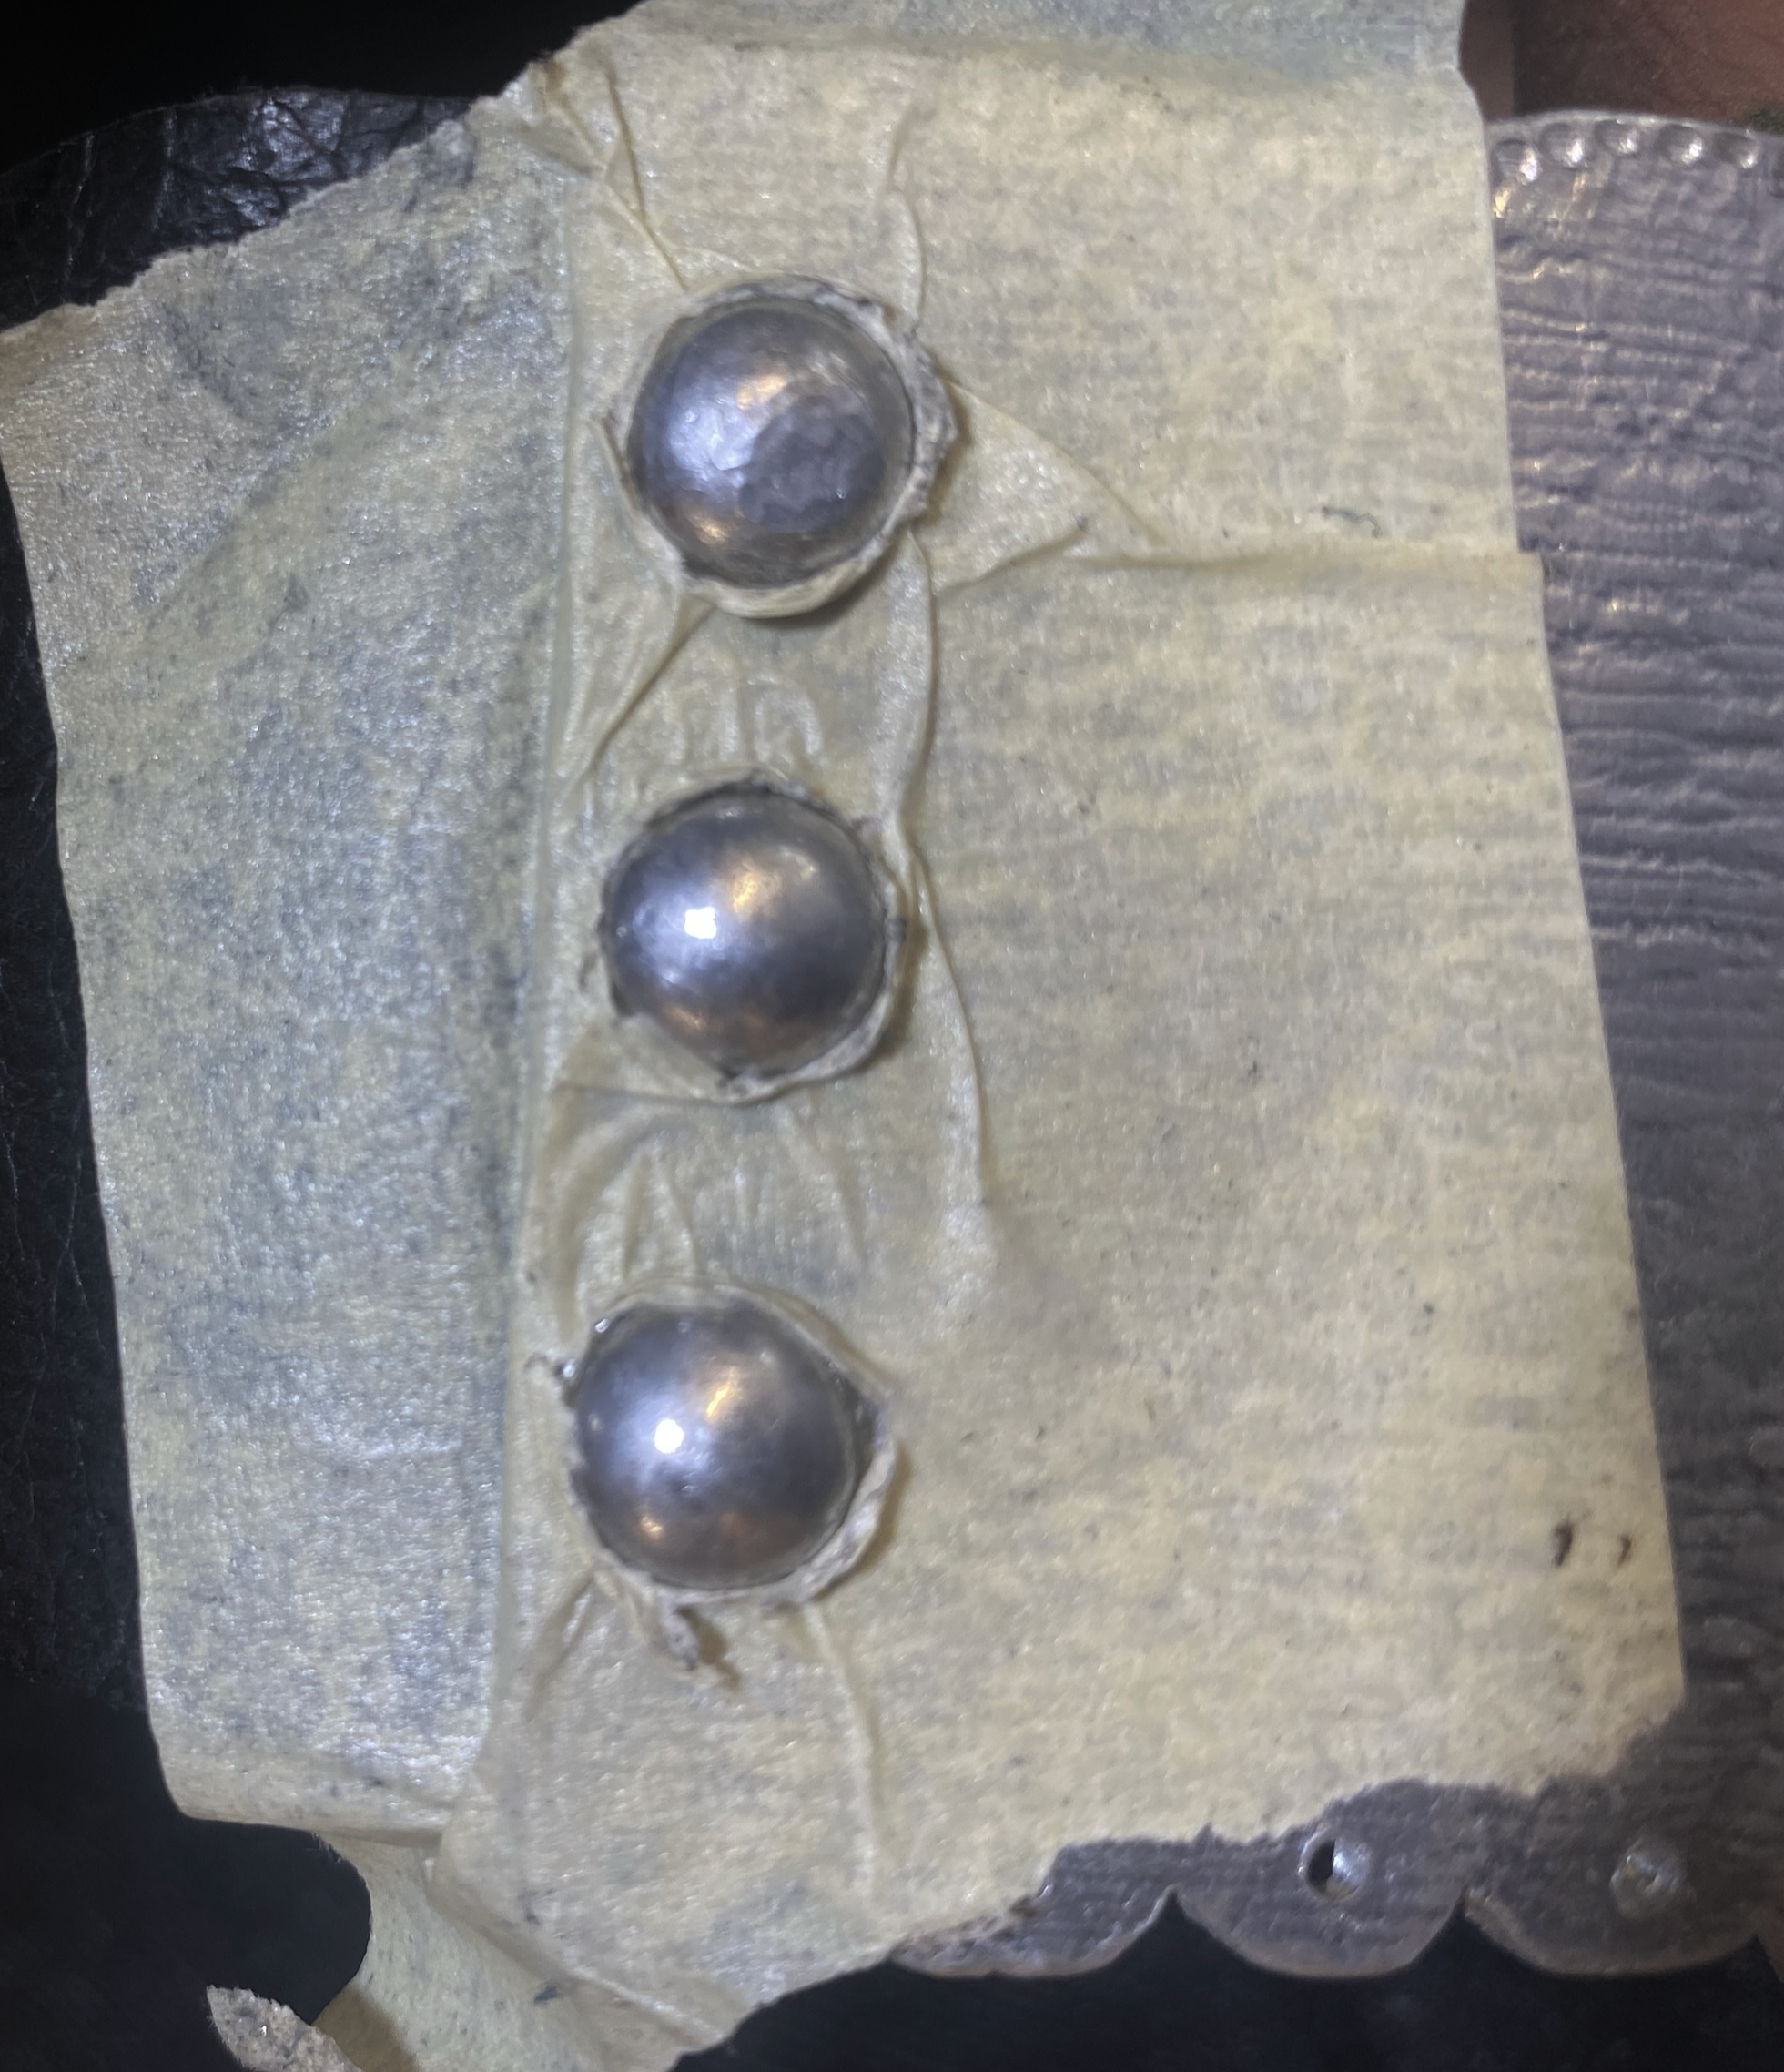
To make the rivets pop and to give more more detail i also engraved each rivet head with a design
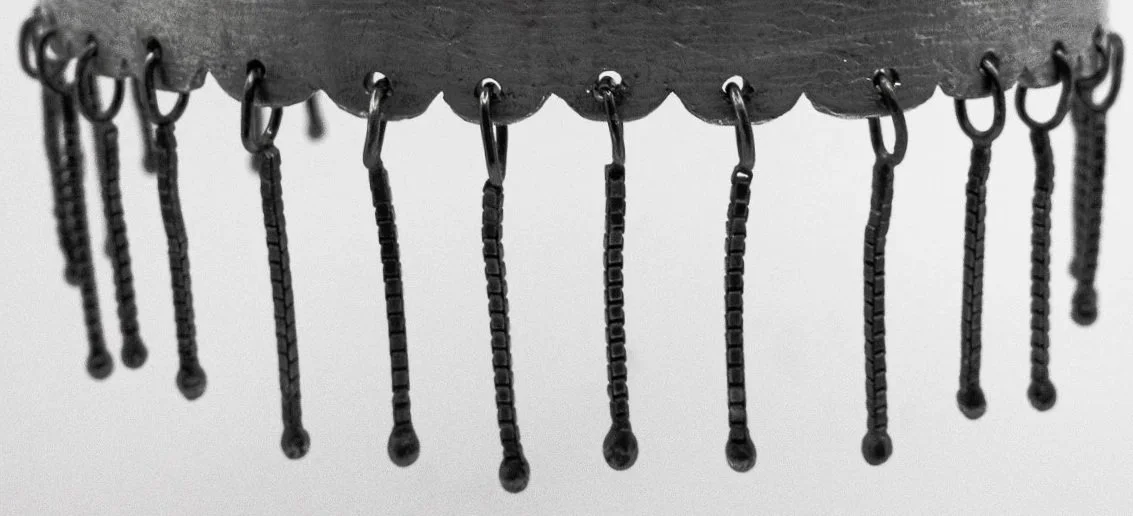
Having Finished the main body and now polished it, i started on the fringes. Because i wanted to make the fringes from scratch and be able to solder, I made the fringes in silver. bending silver wire into oval rings i then Soldered them together with a 6cm long premade silver chain, where i then melted the chain at the bottom until it was around 3cm long to create the balls on the end.
after attaching each fringe to the main body i was done with the cuff.